How to Grow Vegetables Indoors Year-Round
Indoor vegetables need strong light, the right container, and a crop choice that fits your space. This guide shows how to keep harvests going through every season with practical tips from an experienced indoor grower.
Quick Answer
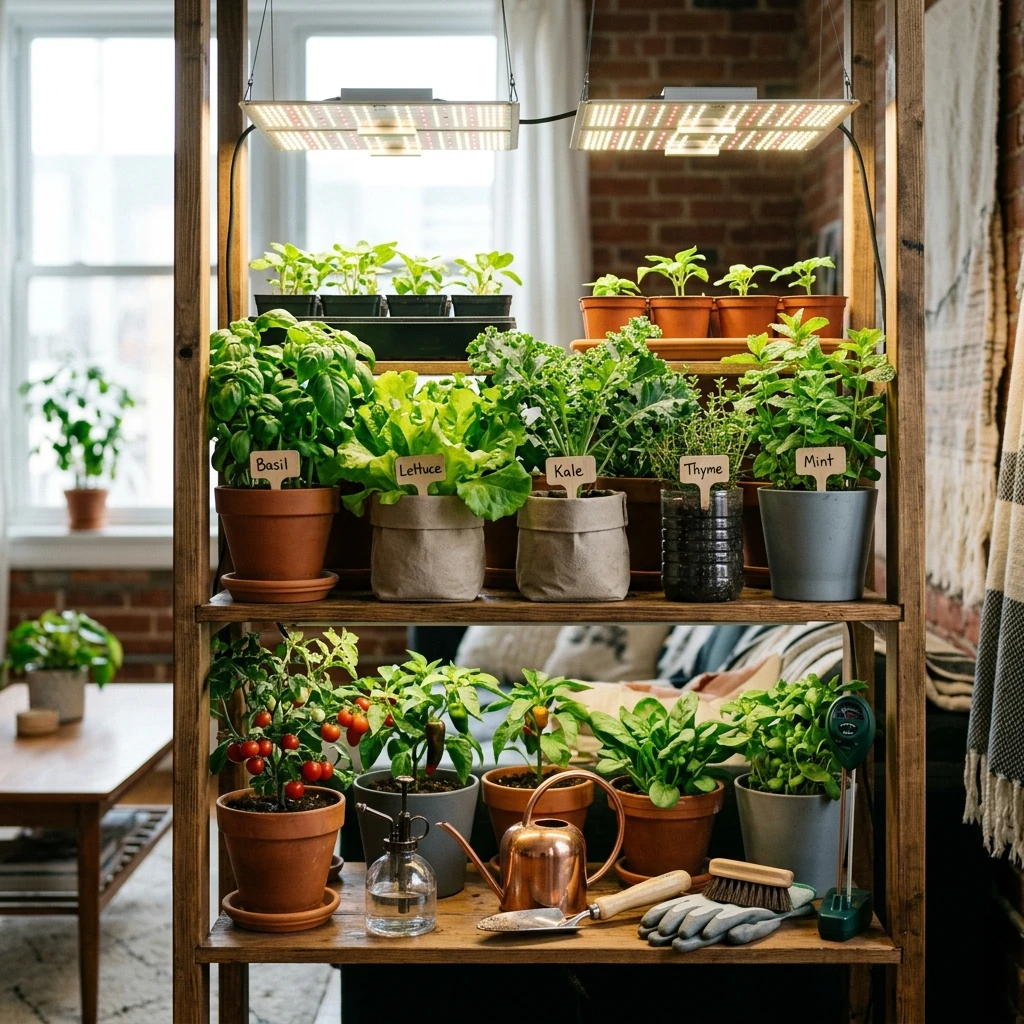
Use strong grow lights (14–16 hours daily), compact varieties like leafy greens and dwarf peppers, quality potting mix with good drainage, and consistent watering. Leafy greens, herbs, radishes, and dwarf tomatoes are the easiest vegetables to grow indoors all year.
Key Takeaways
- Provide 14 to 16 hours of daily high-intensity full-spectrum LED light.
- Choose compact, dwarf cultivars bred specifically for container spaces.
- Hand-pollinate fruiting vegetable flowers using a small brush or gentle shaking.
- Feed consistently with water-soluble nutrients throughout vegetative and fruiting stages.
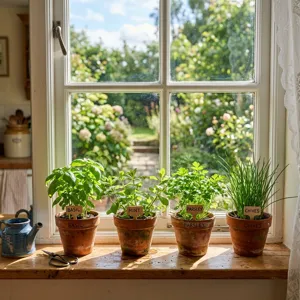
Growing vegetables indoors year-round is absolutely possible if you treat light as the main ingredient. Indoor crops need enough brightness to replace the sun, plus containers, soil, airflow, and a feeding routine. The best plants for this job are compact and fast-growing, especially leafy greens and herbs. Over the past few years, I have grown lettuce, kale, peppers, and even tomatoes in my basement, and I have learned that the biggest mistake is underestimating light. A sunny windowsill might work for a small pot of basil, but for a continuous harvest, you need dedicated grow lights. This guide shares what works, what does not, and how to avoid the common pitfalls that can turn an indoor garden into a disappointing, leggy mess.
Key Takeaways
- Light is the most critical factor; invest in full-spectrum LED grow lights.
- Choose compact or dwarf varieties bred for containers.
- Use a well-draining potting mix, not garden soil.
- Maintain consistent moisture but avoid overwatering.
- Provide good air circulation to prevent fungal issues.
- Fertilize regularly with a balanced, diluted solution.
- Start with easy crops like greens and herbs, then expand to fruiting plants.
Introduction
When I first tried to grow tomatoes indoors, I placed a pot by my south-facing window and hoped for the best. The plant stretched toward the glass, produced a few flowers that dropped, and never set fruit. I was disappointed until I invested in a decent LED grow light and a timer. Within weeks, my basil was bushy, my lettuce was crisp, and I even managed to harvest cherry tomatoes in the middle of winter. Indoor vegetable gardening is not difficult, but it requires a shift in thinking: you are creating a miniature ecosystem where every variable—light, temperature, air, water, and nutrients—is under your control. This guide will walk you through every step, from choosing the right equipment to harvesting your first crop, with practical tips based on both science and real-world experience.
Why It Matters
Growing vegetables indoors gives you fresh, homegrown produce regardless of weather or season. It reduces your reliance on store-bought greens, which often travel long distances and lose nutritional value. It also offers a therapeutic hobby that connects you to nature, even in the middle of a cold winter. For those in apartments or urban settings with limited outdoor space, indoor gardening is the only way to grow edible plants. Beyond personal benefits, indoor growing can teach you about plant biology and develop skills that translate to outdoor gardening. Plus, there is a deep satisfaction in harvesting a salad from your own windowsill when snow is falling outside.
Science Behind It
Plants convert light energy into chemical energy through photosynthesis. The rate of photosynthesis depends on light intensity, spectrum, and duration. Sunlight provides a full spectrum, but indoors, you must replicate that with grow lights. Blue light promotes vegetative (leafy) growth; red light encourages flowering and fruiting. Full-spectrum LEDs cover both, making them ideal for a mixed vegetable garden. Temperature also influences metabolism: most vegetables grow best between 18–24°C (65–75°F). Too hot, and they wilt and flower prematurely; too cold, and growth slows. The ideal humidity is around 50–60% to support transpiration without encouraging mold. Air circulation (via a small fan) strengthens stems and prevents fungal diseases. Finally, the root zone needs oxygen; overwatering displaces soil air, leading to root rot. These principles are the same whether you are growing a single herb or a dozen tomato plants.
Step-by-Step Guide
1. Choose your growing space
Select an area that can accommodate grow lights, containers, and adequate airflow. Basements, spare rooms, or large closets work well. Ensure you have electrical outlets and a stable temperature. Avoid drafty windows in winter. If you have a south-facing window, you can supplement with lights, but pure window light is rarely enough for year-round production in most climates.
2. Invest in grow lights
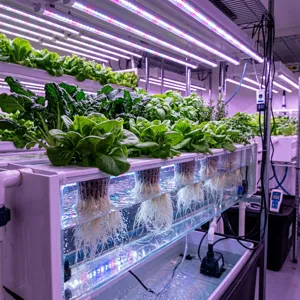
Full-spectrum LED panels or T5 fluorescent tubes are the most efficient. For a shelf system, use adjustable hanging lights. A good rule of thumb: provide 20–30 watts per square foot of growing area. Position lights 15–30 cm (6–12 in) above the plants and adjust as they grow. Use a timer to provide 14–16 hours of light per day. For vegetables that fruit, you may need more red spectrum; some lights have a bloom switch for that.
3. Select containers and soil
Choose containers with drainage holes. Size matters: leafy greens need 10–15 cm (4–6 in) deep; herbs need 15–20 cm (6–8 in); peppers and tomatoes need at least 20–25 cm (8–10 in) deep, and larger if possible. Use a high-quality potting mix, not garden soil. For added drainage, mix in extra perlite (about 25% by volume). Fill containers, leaving space at the top for watering.
4. Pick your crops and varieties
Start with fast-growing, compact varieties. For leafy greens, try 'Black Seeded Simpson' lettuce, 'Bloomsdale' spinach, or any Asian greens. Herbs like basil, chives, cilantro, and parsley thrive. Dwarf peppers like 'Mohawk' or 'Lunchbox' do well. Dwarf tomatoes such as 'Tiny Tim' or 'Micro Tom' are perfect. Avoid long-season or vining crops like cucumbers or indeterminate tomatoes, unless you have height and space.
5. Sow seeds or transplant seedlings
Seeds are economical; germinate them in small pots or seed trays, then transplant to final containers. You can also buy seedlings from a nursery for a head start. Plant at the depth recommended on the seed packet. Water gently after planting.
6. Water and feed
Check moisture daily by feeling the soil; water when the top 2.5 cm (1 in) feels dry. Water thoroughly until it drains out the bottom, then empty saucers to prevent stagnant water. For feeding, use a balanced liquid fertilizer (e.g., 5-5-5) diluted to half strength every 2 weeks during active growth. For fruiting plants, switch to a higher-phosphorus formula (e.g., 5-10-10) when flowers appear.
7. Provide airflow and support
Place a small oscillating fan near the plants to circulate air, which strengthens stems and prevents damping-off fungus. For vining or taller plants, use small stakes or cages. Gently shake flowering plants like tomatoes and peppers to aid pollination, or use a small paintbrush.
8. Harvest regularly
Start harvesting leafy greens when they are 7–10 cm (3–4 in) tall by snipping outer leaves. Herbs can be harvested by pinching stems above a node. For peppers and tomatoes, wait until they are fully coloured and firm. Regular harvesting encourages more production.
9. Rotate and restart
After a few harvests, leafy greens may bolt or become bitter. Pull them and start new seeds. This succession planting keeps your supply constant. For fruiting plants, they can produce for several months; then replace them.
Climate Considerations
Indoor conditions are somewhat independent of outdoor climate, but your ambient home temperature and humidity affect the plants. In cold climates (USDA zones 3–5), winter heating dries the air; you may need a humidifier to keep humidity above 40%. In warm zones (8–10), summer air conditioning can also dry the air; conversely, if you have high humidity, ensure good air circulation to prevent mold. The stable indoor temperature is an advantage, but it also means you must avoid placing plants near heaters or drafty windows. In the UK, Ireland, and Western Europe, where winters are mild but dark, grow lights are essential. In Australia and New Zealand, summer heat can be a concern; ensure your grow lights do not overheat the space, and consider using LED lights, which generate less heat.
USDA zones are less directly relevant, but they help you understand your local seasonal light changes—in northern latitudes, winter days are very short, so you will rely more on lights. In southern regions, you might be able to use a sunroom.
| Factor | Ideal Range | How to Manage |
|---|---|---|
| Temperature | 18–24°C (65–75°F) | Monitor with thermometer; avoid drafts and heat vents |
| Humidity | 50–60% | Use a humidifier if below 40%; increase ventilation if above 70% |
| Air movement | Gentle breeze | Small fan running a few hours daily |
| Light duration | 14–16 hours | Timer to maintain consistency |
Seasonal Advice
Spring and summer outdoors have longer days, but indoors you control the photoperiod. The main seasonal changes are ambient temperature and humidity. In winter, homes are often drier; water more frequently but with smaller amounts to avoid overwatering due to slower evaporation. In summer, if indoor temperatures rise, increase air circulation and consider moving lights higher to reduce heat on plants. Also, in summer, you might open windows if the outdoor air is mild, but ensure pests do not enter. In autumn, as outdoor light wanes, maintain the same light schedule with your grow lights. Essentially, your indoor garden is seasonally independent, but you must adjust for indoor climate swings.
Common Mistakes
- Underestimating light needs—trying to grow with a single small bulb or a dark window.
- Overwatering—the number one killer of indoor plants.
- Using garden soil, which compacts and suffocates roots.
- Fertilizing too much or too often—causes salt build-up and burn.
- Not providing air circulation—invites fungus and weakens stems.
- Choosing the wrong variety—large indeterminate tomatoes will not thrive in limited space.
- Skipping succession planting—you end up with a glut then nothing.
Maintenance Schedule
- Daily: Check soil moisture, inspect for pests, turn lights on/off (or use timer).
- Weekly: Rotate pots for even light exposure; prune any yellow or dead leaves.
- Every 2 weeks: Fertilize (diluted solution), check pH if you have issues.
- Monthly: Clean dust off grow lights; clean fan filters; inspect roots if growth is slow.
- After each harvest: Trim plants to encourage regrowth; remove spent plants and replant.
Buying Guide
For grow lights, start with a full-spectrum LED panel, about 100–200 watts actual draw. Brands like Mars Hydro, Spider Farmer, or Viparspectra are reliable. Avoid cheap blurple (blue-red only) lights; full-spectrum is easier on your eyes and works for all stages. For containers, plastic or fabric grow bags are lightweight and inexpensive. Fabric bags aerate roots well. For soil, buy a bag of premium potting mix and a bag of perlite. Also, get a light timer, a small fan, and a watering can with a narrow spout. Consider a seedling heat mat if your growing area is cool. Seeds are best bought from reputable seed companies that offer compact varieties.
| Item | Budget Option | Premium Option |
|---|---|---|
| LED grow light (100–200W) | $60–100 | $150–250 |
| Light timer | $10–15 | $20–30 (digital) |
| Containers (10–20 cm / 4–8 in) | $10 for 5 (plastic) | $25–40 (fabric or decorative) |
| Potting mix (20 L / 5 gal) | $5–8 | $12–18 (organic) |
| Perlite (4 L / 1 gal) | $5 | $10 |
| Small fan | $15–20 | $30–50 (oscillating) |
| Fertilizer (liquid) | $8–12 | $15–25 (organic concentrate) |
| Seeds (several varieties) | $10–15 | $20–30 (exclusive varieties) |
| Total starter cost | $123–185 | $292–423 |
Expert Tips
From my experience, the single biggest improvement came when I added a timer. Consistency in light is crucial—plants get used to a rhythm, and when you forget to turn lights on or off, they stress. Also, do not be tempted to over-feed; most potting mixes have enough nutrients for the first few weeks. I also recommend using white or reflective surfaces (like a white shelf) to bounce light around. For leafy greens, harvest with a 'cut-and-come-again' approach; take outer leaves, let inner ones grow. For tomatoes, you can hand-pollinate by gently tapping the flowers or using an electric toothbrush to vibrate them. Finally, keep a small notebook to log what you plant, dates, and yields—it helps you learn what works best in your specific setup.
Common Myths
- Myth: You need a greenhouse to grow vegetables indoors. Reality: Grow lights and a shelf are enough.
- Myth: Any window will work. Reality: Windows often provide too little light, especially in winter.
- Myth: Indoor vegetables do not need pests management. Reality: Pests like aphids and spider mites can still appear; inspect regularly.
- Myth: You can use outdoor compost indoors. Reality: Compost may introduce bugs; use sterile potting mix.
- Myth: More water is better. Reality: Overwatering is more common and more damaging than underwatering.
When NOT To
- Do not try to grow large, vining crops like winter squash or pumpkins indoors—they need too much space.
- Do not start if you cannot provide at least 12 hours of strong light daily.
- Do not grow indoors if your room temperature frequently drops below 15°C (59°F)—growth will be very slow.
- Do not invest in expensive hydroponic systems unless you have mastered soil-based growing first.
- Do not plant multiple seeds in one pot without thinning—they will compete and remain stunted.
Decision Guide
| Available Light | Space Available | Recommended Vegetables |
|---|---|---|
| High (grow lights, 14+ hrs) | Large shelf or table | Tomatoes (dwarf), peppers, eggplants, cucumbers (compact) |
| High (grow lights) | Small area | Lettuce, herbs, radishes, green onions |
| Medium (window + supplement) | Small | Herbs, microgreens, baby greens |
| Low (only window) | Any | Not recommended for year-round; try parsley, mint (tolerate less) |
Troubleshooting
| Symptom | Likely Cause | Remedy |
|---|---|---|
| Leggy, stretched stems | Insufficient light | Move lights closer or increase wattage |
| Yellow lower leaves | Overwatering or nitrogen deficiency | Reduce watering; fertilize with balanced feed |
| Brown leaf edges | Dry air or salt build-up | Increase humidity; flush soil with water |
| Mold on soil surface | Poor air circulation, overwatering | Scrape off, improve airflow, water less |
| Flowers drop off | Poor pollination or stress | Hand pollinate; check temperature and watering |
| Pale leaves with green veins (chlorosis) | Iron deficiency, often from high pH | Add chelated iron; check pH (aim 6.0–6.5) |
Frequently Overlooked Facts
Many first-timers forget that indoor vegetables need a dark period—14–16 hours of light, then 8–10 hours of darkness. Constant light can stress plants. Also, the water you use matters: if your tap water is hard or chlorinated, let it sit overnight before watering to allow chlorine to evaporate. Another overlooked point is that you can grow root vegetables like radishes and dwarf carrots indoors; they just need deeper containers. Finally, succession planting is key: every 2–3 weeks, start new seeds so you have continuous harvests, not a single big flush.
Summary
Growing vegetables indoors year-round is a rewarding and practical way to enjoy fresh produce regardless of the season. The essentials are simple: bright grow lights, suitable containers and soil, consistent watering, good airflow, and the right crop choices. Start with leafy greens and herbs, then gradually add fruiting vegetables as you gain confidence. Keep a regular maintenance routine and adjust based on your plants' feedback. With patience and attention, you can harvest salads, herbs, and even tomatoes from your indoor garden in the dead of winter. Enjoy the process, and do not be afraid to experiment—every failure is a lesson that brings you closer to a thriving indoor harvest.
Recommended next actions
Next Best Actions
Move from reading to action with related calculators, plant profiles, and quiz-based recommendations.
Guide
Home Garden Starter Equipment: Essential Tools for Beginners
You do not need a shed full of tools to start a home garden. This guide shows the essentials, the nice-to-haves, and what you can skip until you have more plants. From containers to watering gear, we cover it all.
Guide
Best Fertilizer for Vegetable Gardens: NPK Ratios, Timing & Feeding Guide
Vegetables need targeted nutrition at the right growth stage. Learn how to choose fertilizer from crop needs, soil test results, NPK ratios, and growing conditions.
Guide
Beginner Botanical Toolkit: 10 Essential Growing Tools
After setting up over 1,000 beginner plant corners in western apartments, I'll share the 10 tools that actually matter—and which ones you can skip—so you don't waste money on useless gadgets.
Frequently Asked Questions
What vegetables grow best indoors?
Do indoor vegetables need grow lights?
How much light do indoor vegetables need?
Can I grow tomatoes indoors all year?
What container size should I use indoors?
How often should I water indoor vegetables?
Can I grow root vegetables indoors?
What is the best soil for indoor vegetables?
Do I need a fan for indoor vegetable growing?
How do I pollinate indoor fruiting vegetables?
Explore More