How to Build a Paludarium Step by Step
Building a paludarium involves planning an integrated land and water enclosure and working through the stages in a sensible order. This construction workflow explains how to make your own paludarium, what materials and equipment are needed, and how to compare enclosure options, then covers determining aquatic-zone water volume, building the drainage and substrate structure, installing hardscape, setting up the water system and lighting, planting the zones, and testing and stabilizing the system before livestock. Reference tables summarize the build sequence, a materials and equipment checklist, common enclosure options, and an illustrative timeline.
Quick Answer
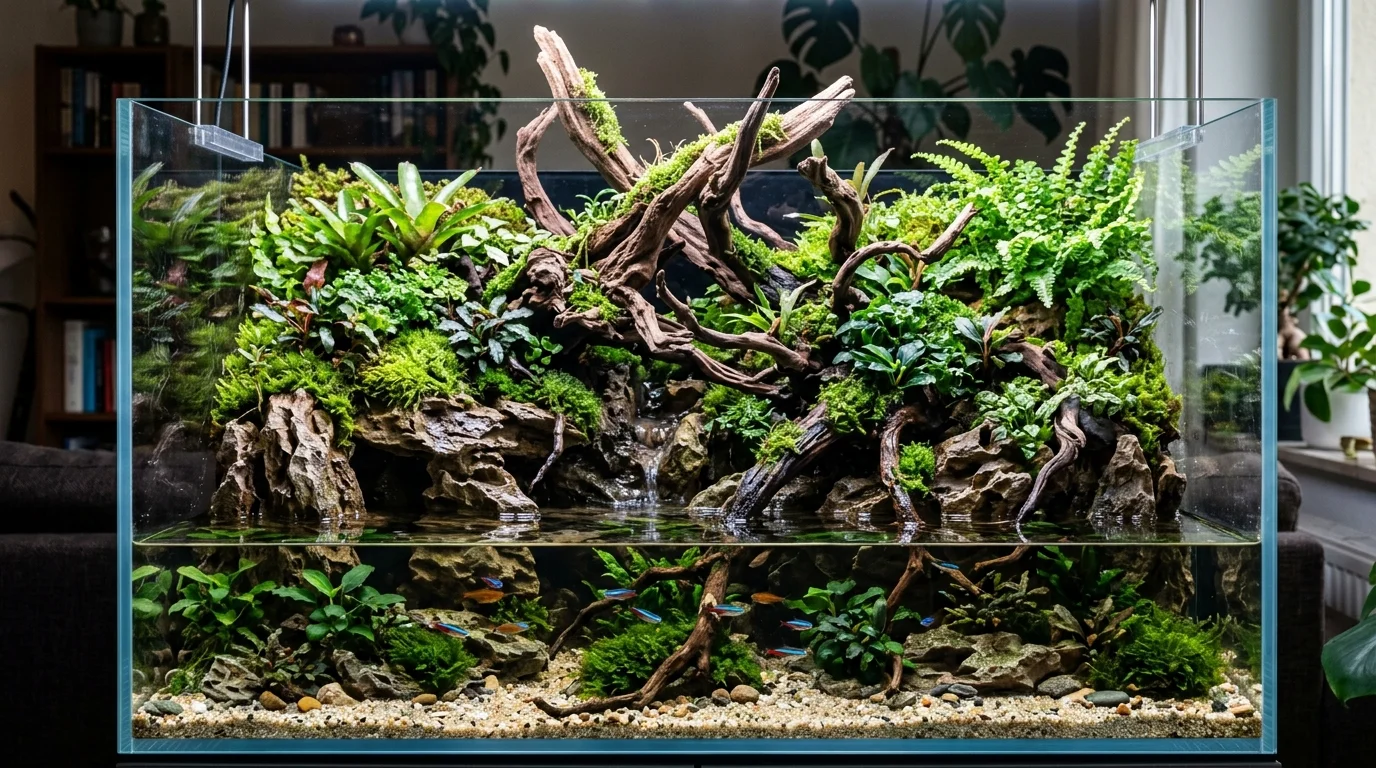
To build a paludarium step by step: plan the land/water layout, choose the enclosure, build the terrain and drainage structure, add substrate and hardscape, install circulation/filtration, add lighting, plant the terrestrial and aquatic zones, fill and test the system, and stabilize the environment.
Key Takeaways
- Plan your land-to-water proportion and equipment access before permanently installing any hardscape.
- There is no single best beginner tank: compare footprint, height, access, water-holding capability and equipment space for your own design.
- Which materials and equipment you need depends on your design; the checklist separates core items from design-dependent, optional, and system-specific ones.
- Determine your actual aquatic-zone volume to inform equipment planning, and select pumps by delivered flow using the manufacturer's data.
- Choose sealants and foams that their manufacturers identify as suitable for the intended wet environment, and cure them according to the manufacturer's instructions.
- Ensure terrestrial substrate is properly drained and separated from the aquatic zone, using a drainage approach that suits your build.
- Keep all mechanical equipment, such as pumps and filters, easily accessible for routine maintenance, and expect upkeep to depend on your water volume, planting, and livestock.
- Gradually fill and test the system for leaks, splash issues, and dead zones, and rely on water-quality testing rather than a fixed calendar date before adding fish.
How Do I Make My Own Paludarium?
You can build your own paludarium from a suitable waterproof enclosure by working through a repeatable sequence: plan the layout, prepare the enclosure, build the land and water structure, add substrate and hardscape, install the water system and lighting, plant the zones, then fill, test, and stabilize the system before introducing livestock. The steps below summarize the workflow, and each stage is covered in more detail further down the page.
- Plan your land-to-water layout and equipment access.
- Choose the enclosure and check that it holds water.
- Build the land boundary, base, and drainage structure.
- Add the terrestrial and aquatic substrates.
- Place and secure the hardscape.
- Install the pump and filtration.
- Install the lighting.
- Plant the land, marginal, and aquatic zones.
- Fill gradually, test for leaks and circulation, and fix any problems.
- Let the system stabilize before adding livestock.
How long a build takes depends on the design, the materials, and the curing and testing involved. A simple build can move quickly, while a complex build with carved terrain, a waterfall, or extensive hardscape may take substantially longer. The illustrative timeline table below shows how the stages fit together, but always follow product instructions and your own test results.
What Is Needed for a Paludarium?
The exact equipment depends on your design, but most paludarium builds need a waterproof enclosure, a way to separate land from water, a substrate arrangement for any planted terrestrial areas, hardscape, plants, and lighting. Builds with recirculating water also need a pump or filtration, and some systems need temperature control or water treatment depending on the intended plants and inhabitants. The checklist table below groups each item as core, depends on design, optional, or required for specific systems.
- Core for a planted paludarium: a suitable enclosure, lighting appropriate for the plants, and plants appropriate to the intended zones.
- Depends on design: a land boundary or divider, sealant where sealing or attachment is needed, drainage and separator layers, aquatic substrate, and hardscape.
- Required for specific systems: planted terrestrial substrate, and a pump or filtration for recirculating water.
- Optional: a waterfall, fogger or misting system, a cleanup crew, and monitoring tools such as a hygrometer.
Electrical safety applies to every build with powered equipment. Plug equipment into a GFCI-protected outlet, use drip loops in cords, and keep connections away from splash zones.
Plan the Paludarium Before You Build
Before assembly, decide whether your build will use an open canopy or a sealed hood. Review our guide on open vs closed paludariums to calculate evaporation reserves and humidity limits.
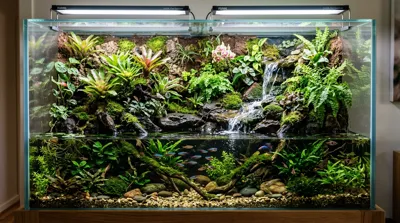
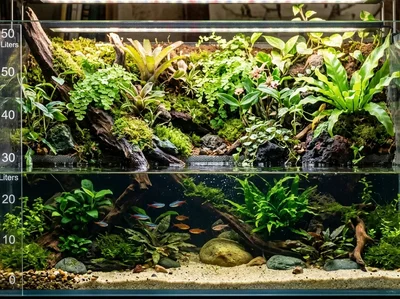
Before purchasing materials, define your intended land-to-water balance. Decide the land-to-water proportion based on the enclosure, intended plants, aquatic depth, access, hardscape and planned inhabitants. A paludarium setup requires deciding on the enclosure dimensions, the location of the aquatic zone, and the amount of terrestrial planting area. Consider how you will access the tank for maintenance, where the pump and filter will be hidden, and whether you want to integrate a waterfall. Proper planning ensures that drainage, water management, and equipment access are incorporated before the permanent hardscape is installed.
What Is the Best Tank for a Beginner to Build a Paludarium?
There is no single best tank for every beginner. A practical starter enclosure is one that is large enough to create separate land and water zones while leaving room for equipment and maintenance access. Standard aquariums are widely available, while front-opening terrariums can provide easier access but may have restrictions on standing water. Compare footprint, height, access, water-holding capability and equipment space before choosing. If you buy a used aquarium, leak-test it before building. The table below compares common options by typical use rather than ranking them.
Choose the Enclosure and Land-Water Layout
The foundation of a DIY paludarium is a suitable waterproof enclosure. Front-opening terrariums often provide excellent ventilation and easy maintenance access, though they may have a limited maximum water depth or may not hold standing water at all. Standard glass aquariums can also be used, though their top-access design requires careful vertical planning. Determine where the land will sit and where the water will pool. If you are starting with a standard fish tank, refer to our guide on converting an aquarium into a paludarium for retrofit-specific considerations.
Calculate the Aquatic-Zone Water Volume
Before building the aquatic section, determine the actual aquatic-zone volume so you can plan equipment and operating capacity around the finished water zone. The nominal size of the enclosure will be significantly larger than the actual aquatic capacity once land and hardscape are added, and displacement means your estimate may not match the final filled volume perfectly. Actual aquatic-zone volume helps inform equipment planning, such as pump and filter selection. Use our paludarium water volume calculator to estimate your usable capacity.
Build the Base, Drainage and Substrate Structure
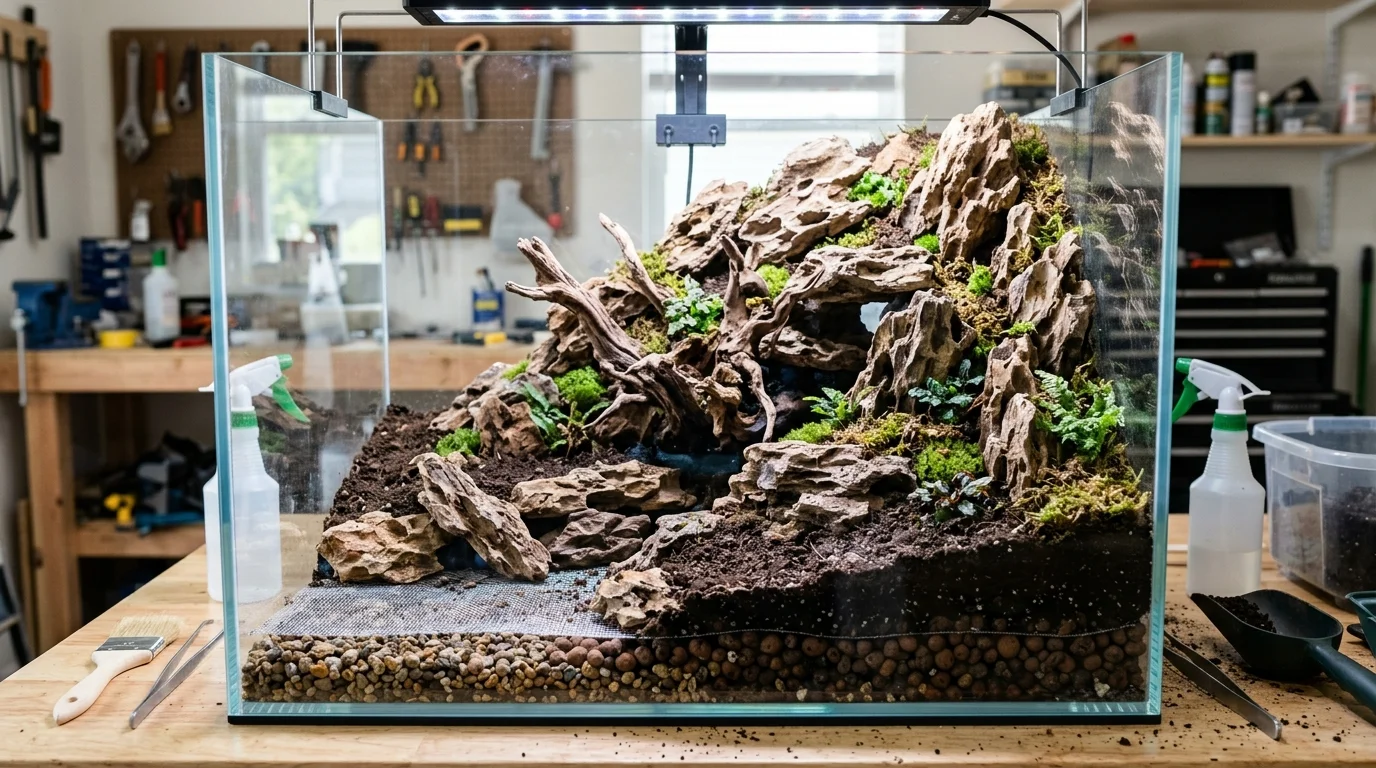
The terrestrial section requires a structural base to keep it elevated above or separated from the water. Depending on your design, this might involve a false bottom made of egg-crate, or a drainage layer. You must create retaining barriers to prevent terrestrial substrate from migrating into the aquatic zone. If the design uses a terrestrial substrate section that needs drainage, create a drainage path appropriate to the structure and substrate depth, with a separator that prevents substrate from migrating into the drainage space. Drainage architecture varies by build, so choose the approach that suits your structure rather than copying a single universal layer thickness. The goal is to keep drainage paths accessible and plan for natural water movement without waterlogging the land. For detailed soil formulations, see our guide on bioactive substrate.
Create the Land and Aquatic Hardscape
For wet vertical backgrounds and waterfall channels, see our guide on paludarium moss attachment and wicking.
Hardscape includes the rocks, driftwood, cork bark, terraces, and slopes that form the visual structure of your paludarium setup. Submerged hardscape differs from terrestrial hardscape; ensure that underwater materials are suited to wet environments and securely placed. Avoid treated, painted, or coated materials unless they are confirmed safe for your intended system. Secure any unstable structures and always leave access for your pump and any temperature-control equipment. The hardscape must be completely stable before adding water or plants.
Shape Terrain With Foam, Silicone and Other Construction Methods
Expanding foam and silicone are popular optional techniques for creating lightweight, dramatic terrain. You can use expanding foam to build backgrounds, shape cured foam into natural contours, and attach surface materials like coconut fiber using silicone. Choose a sealant that its manufacturer explicitly identifies as suitable for the intended aquarium or water-contact application, and follow the current product instructions. For expanding foam, use a product whose manufacturer documents suitability for the intended wet environment, follow the product's ventilation, application and curing instructions, and keep uncured material away from plants, animals and occupied systems. Allow the material to cure fully according to the manufacturer's instructions before exposing it to water or livestock, and check the structural stability before introducing water. Remember that these are just construction methods; a paludarium can also be built entirely with stacked natural hardscape.
Install the Pump and Filtration
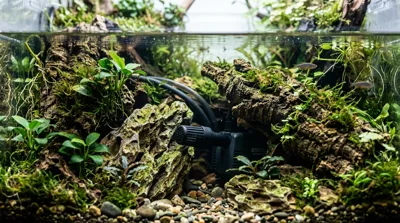
Your circulation and filtration system manages water movement and, where used, filtration in the aquatic zone. Start with the actual aquatic-zone volume, then determine the circulation your design requires. Select equipment based on the flow it actually delivers in your setup, using the manufacturer's pump curve, and account for vertical lift, tubing, fittings, and filter resistance, all of which reduce delivered flow. Determine the pump placement, ensure the intake remains accessible for cleaning, and plan the return path. Verify the manufacturer's minimum operating water level to prevent the pump from running dry due to evaporation. Temperature-control equipment may also be required depending on the intended system and inhabitants. Keep this installation straightforward and leave room for maintenance. For detailed sizing guidance, refer to our paludarium filter and pump guide.
Build a Waterfall or Elevated Water Return
A waterfall is an explicitly optional feature. If you decide to include one, plan the return destination and integrate the discharge path into your hardscape during the structural phase. Pay close attention to splash containment; excessive splashing can waterlog the terrestrial soil or leak outside the enclosure. Check the flow path and ensure maintenance access before permanently sealing the feature. If you are building this feature, see our paludarium waterfall guide.
Install Paludarium Lighting
Paludarium lighting must cater to both the terrestrial canopy and the aquatic depths. Install lighting appropriate for the plants and enclosure, and consider fixture height, coverage, shading from the hardscape, and heat output so that the fixture does not damage the plants or the enclosure. Use a timer where appropriate, and keep the fixtures accessible for maintenance. For PAR, spectrum and photoperiod details, refer to our paludarium lighting guide.
Add and Position the Plants
When transitioning aquatic plants to emersed ledges, understand emersed vs submerged plant morphology to manage cuticle shock. If leaves soften or decay during establishment, consult the paludarium plants melting recovery guide.
Wait to begin planting until all structural work is fully stable and cured. Match your plants to their required moisture and light zones, carefully selecting terrestrial, emersed, and true aquatic species for their respective areas. Leave adequate room for future growth and maintenance, and ensure that creeping plants and roots are kept away from moving mechanical components. For botanical selection advice, see our paludarium plants guide.
Fill, Test and Stabilize the Paludarium
Once the build is physically complete, begin a gradual filling process, pouring water onto a plate or bowl to avoid disturbing substrate, and treat the water as needed for your intended system. Check for leaks around the enclosure and structural barriers, allowing enough time to confirm they remain watertight. Observe the water movement, check the pump intake for blockages, and ensure the waterfall splash is contained. Verify that the terrestrial land is draining properly and that there are no stagnant aquatic dead zones. Test the lighting timers. Correct any structural or mechanical problems now. If fish are planned, allow the aquatic system to establish an appropriate nitrogen cycle and verify the water with testing before introducing them. Timing varies by setup, and ammonia and nitrite should be at appropriate zero readings before fish are added. Let the environment mature before introducing livestock.
Final Paludarium Build Checklist
- Enclosure is secure and waterproof.
- Land and water layout is stable and separated.
- Drainage is functioning properly without waterlogging soil.
- Terrestrial substrate is contained.
- Rocks, wood, and hardscape are secure.
- Actual aquatic volume is understood.
- Pump is accessible and intake is protected.
- Filtration is accessible for routine maintenance.
- Waterfall (if applicable) is tested for splash containment.
- Lighting is installed and on a timer where appropriate.
- Plants are positioned in appropriate moisture zones.
- System has been checked for leaks.
- Circulation has been checked for dead zones.
- Evaporation and maintenance access have been accounted for.
- Electrical equipment uses a GFCI outlet and drip loops.
- The entire system has been observed and stabilized before introducing livestock.
Frequently Asked Questions
How do you build a paludarium step by step?
Start by planning your land-to-water layout, then select an appropriate enclosure. Build the structural foundation and drainage, install the hardscape, add the circulation and filtration system, install lighting, position the plants, and finally fill, test, and stabilize the system.
How hard is it to maintain a paludarium?
Maintenance is more involved than a simple planted enclosure because a paludarium combines terrestrial and aquatic systems. The workload depends on water volume, planting density, filtration, humidity, hardscape, evaporation and whether livestock are present. Routine tasks can include checking water level and equipment, pruning plants, cleaning pumps or filters, removing debris and monitoring water quality when an aquatic bioload is present.
Can you build a paludarium in a terrarium?
Yes, but check the specifications first. Some front-opening glass terrariums have watertight bases, while others are not designed to hold standing water, and the water level may be limited by the door opening. Verify the water-holding capability and maximum water depth stated by the manufacturer for your specific model, and do not assume a standard terrarium is watertight.
Can you build a paludarium in an aquarium?
Yes, standard aquariums can be converted into paludariums, though they only offer top access. You must carefully plan the layout to ensure you can reach the bottom for maintenance.
Do you need expanding foam to build a paludarium?
No. Expanding foam is a popular construction method for carving lightweight terrain and backgrounds, but you can also build a paludarium using stacked rocks, wood, structural egg crate, or commercial platforms.
Is it safe to use silicone and expanding foam in a paludarium?
Choose a sealant that its manufacturer explicitly identifies as suitable for the intended aquarium or water-contact application, and follow the current product instructions. For expanding foam, use a product whose manufacturer documents suitability for the intended wet environment, follow its ventilation, application and curing instructions, and keep uncured material away from plants, animals and occupied systems.
Does a paludarium need a drainage layer?
If you have a terrestrial substrate section that sits near the water line, some form of drainage is usually needed to keep the soil from becoming waterlogged. However, systems using hollow false bottoms or purely aquatic substrate may not need a traditional drainage layer, so drainage architecture varies by build.
Does a paludarium need a filter?
If the aquatic zone uses recirculating water, a pump or other circulation system may be needed to move water and support the chosen filtration setup. The need for dedicated mechanical or biological filtration depends on the aquatic volume, bioload, system design, and intended plants or livestock.
How deep should the water be in a paludarium?
There is no single correct water depth. Choose the aquatic depth based on the enclosure, intended aquatic life, land structure, equipment requirements and the manufacturer's limits for the enclosure. The usable water volume matters more than a universal depth target.
Do you need a waterfall in a paludarium?
No. A waterfall is a decorative aesthetic feature that also provides circulation, but you can achieve excellent water movement using a standard submerged pump return or a gentle stream.
How long does it take to build a paludarium?
The time varies with design complexity, the materials used, and the testing and stabilization your system needs. A simple build may be assembled relatively quickly, while a complex build with carved terrain, hardscape, and a waterfall can take substantially longer. Sealants and foams must cure according to their manufacturer's instructions before water is added, and the system should be leak-tested and stabilized before livestock are introduced.
What should you test before adding animals to a paludarium?
Test the system for leaks, verify the pump and circulation are functioning smoothly without creating dead zones, ensure the land section is draining properly, check the lighting coverage, and allow the system to fully stabilize before introducing livestock. If fish are planned, allow the aquatic system to establish an appropriate nitrogen cycle and verify the water with testing before introducing them; ammonia and nitrite should be at appropriate zero readings.
Explore More
Related Articles

Related Plant Guides
No specific plant guides found matching this topic.
Recommended next actions
Continue Exploring
Dive deeper into related plant care tools and profiles.
Topic Guide
What Is a Paludarium? Design, Anatomy, and Ecosystem Setup
Learn what a paludarium is, how land and water zones work together, and how to plan drainage, circulation, substrate, planting, and maintenance.
Topic Guide
Paludarium Plants: Choosing Plants for Land & Water Zones
Learn how to choose paludarium plants by land, emergent, humid, and aquatic zones, with guidance on light, moisture, growth, and maintenance.
Topic Guide
Paludarium Water Volume: Calculating Your Usable Aquatic Space
A guide to determining the true usable water volume in a paludarium setup, with worked examples, displacement estimates, and equipment sizing.
Topic Guide
Paludarium Filter and Pump Guide
A practical hydraulic and equipment guide for sizing paludarium pumps and filtration around net water volume, operating head, plumbing resistance, shallow-water intake geometry, flow control, evaporation, heating, biological media, canister filters, and serviceability.
Topic Guide
Paludarium Lighting Guide
A practical engineering guide to paludarium lighting covering plant-level PAR targets, terrestrial and submerged gradients, photoperiod, spectrum, fixture elevation, optical losses, heat and evaporation.
Topic Guide
Paludarium Waterfall Guide
A practical construction guide for paludarium waterfalls covering cascading flow paths, expanding-foam baffles, slate tiers, structural support, splash mitigation, acoustic dampening, mold prevention and hidden plumbing service access.