Paludarium Moss: How to Attach, Hydrate, and Maintain Moss
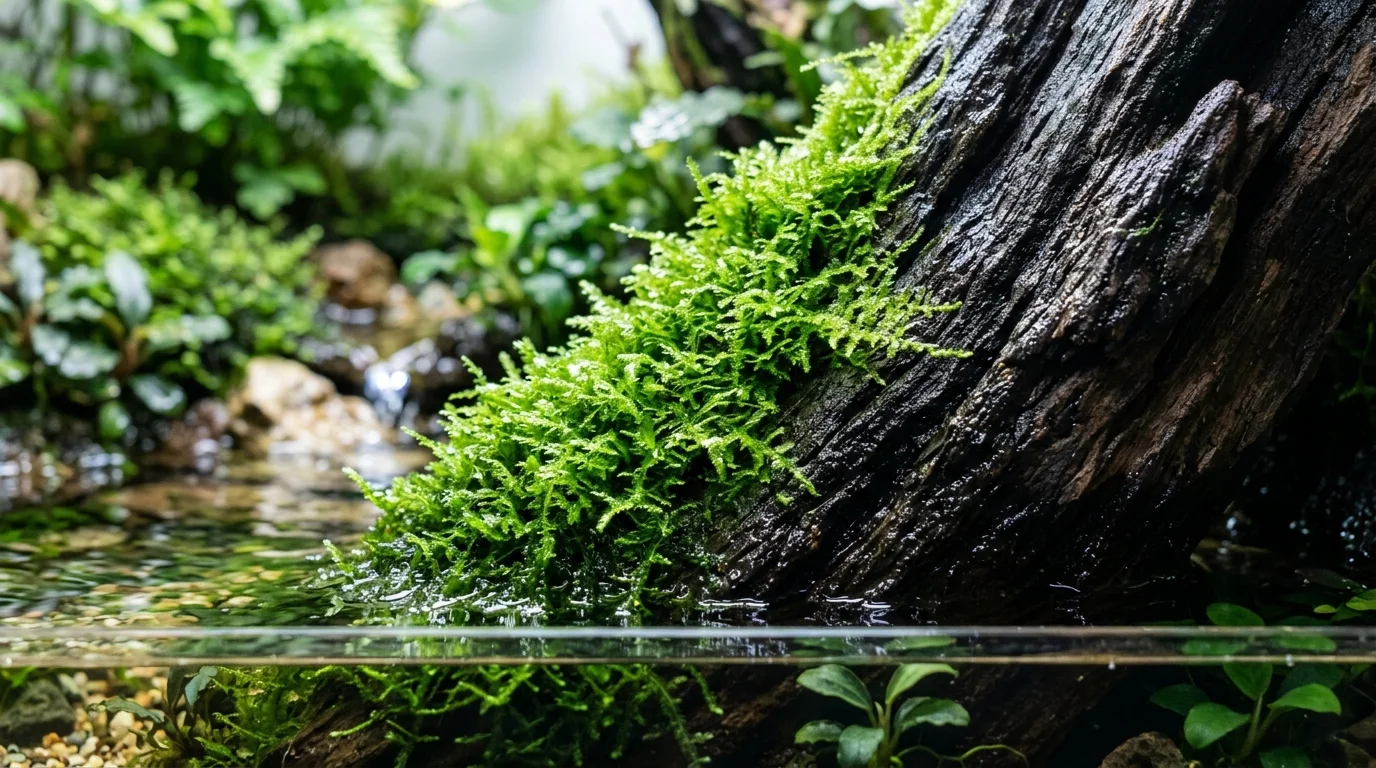
Paludarium moss succeeds when attachment, hydration, light, and airflow are designed together. Cyanoacrylate gel provides fast attachment to hardscape, while cotton thread, fishing line, and stainless steel mesh provide mechanical alternatives. The dry-start method can establish moss under humid conditions, while slurries offer broader but less controlled distribution. Water can reach moss through capillary wicking, waterfall splash, misting, or deliberate combinations of these methods. For low-light moss zones, approximately 30–50 μmol/m²/s PAR is a useful starting calibration range. Browning should be diagnosed by texture and environmental context: dry patches, excessive saturation, stagnant air, algae, detachment, and active tissue decay require different responses. Individual moss species belong in standalone plant profiles, while this topic provides the technical framework for selecting and maintaining moss across terrestrial, splash, transition, and submerged paludarium zones.
Quick Answer
Paludarium moss performs best when attachment, moisture delivery, light, and airflow match the growth zone. Cyanoacrylate gel is useful for fast attachment to hardscape, thread or fine mesh can provide mechanical support, and a dry-start method can establish emersed growth before full flooding. Moss can receive water through capillary wicking, controlled waterfall splash, or active misting, but continuously stagnant and saturated conditions can encourage browning and decay. For most low-light moss placements, a leaf-level PAR target around 30–50 μmol/m²/s provides a useful starting range while avoiding excessive light that can favor algae. Use the paludarium plants guide for broader flora selection and the paludarium plants melting guide when browning progresses into tissue decay.
Key Takeaways
- Attach moss firmly to the hardscape while preserving a thin, well-spread layer; thick clumps trap moisture internally and can develop poorly ventilated brown patches.
- Match hydration to the zone: capillary wicking provides steady background moisture, splash provides intermittent wetting, and misting provides controlled surface hydration.
- Start low-light moss zones around 30–50 μmol/m²/s at the foliage and prioritize even coverage and airflow over simply increasing intensity for faster growth.
- When moss browns, first inspect moisture consistency, stagnant air, algae competition, attachment stability, and decaying material; use the paludarium plants melting guide if tissue becomes slimy or decomposes.
What Makes Moss Different in a Paludarium?
Moss can occupy several distinct microhabitats in a paludarium. It may grow on an exposed terrestrial wall, remain continuously damp in a transition zone, receive intermittent waterfall splash, or grow fully submerged. The same general attachment technique can therefore produce very different results depending on how water, light, and air reach the moss.
The most reliable moss installations are designed around four interacting variables: mechanical attachment, water delivery, light intensity, and airflow. A moss mat that is firmly attached but remains permanently stagnant can brown. A well-hydrated mat under excessive light can become covered by algae. A healthy moss species can also fail if a thick layer is packed against a surface with no opportunity for internal drying or gas exchange.
This topic focuses on those physical and horticultural techniques. Individual moss species have their own entity profiles in the plant database; use the paludarium plants guide for broader species-selection decisions.
Paludarium Moss by Growth Zone
| Zone | Typical Moisture Delivery | Primary Risk | Useful Attachment Approach |
|---|---|---|---|
| Terrestrial wall | Wicking or misting | Drying between hydration events | Cyanoacrylate gel, thread, or mesh |
| Splash zone | Intermittent waterfall splash | Excessive saturation and stagnant pockets | Gel, thread, or mechanically supported mesh |
| Transition shelf | Wicking plus occasional splash | Uneven moisture distribution | Thin moss layer with secure contact |
| Submerged hardscape | Continuous water contact | Algae and detachment | Gel, thread, or mesh depending on substrate |
How to Attach Moss to Paludarium Hardscape
The objective is not to glue a large ball of moss to a surface, unless you are creating emergent wabi-kusa substrate balls. The objective is to establish close contact between a thin layer of moss and the substrate so that new growth can anchor itself while the original attachment remains stable.
- Clean loose dust, mud, or debris from the attachment surface.
- Separate the moss into thin, manageable portions rather than large compressed clumps.
- Spread each portion across the intended surface.
- Use the smallest practical amount of attachment material.
- Press the moss against the hardscape so the attachment point contacts both the moss base and substrate.
- Keep the moss mechanically stable during its initial establishment period.
- Provide the moisture and light appropriate to the zone.
Dense coverage should develop progressively. Packing a thick layer onto a wall may create a visually full installation immediately, but the interior can remain excessively wet or poorly ventilated.
Cyanoacrylate Gel for Moss Attachment
Cyanoacrylate gel, commonly sold as superglue gel, is widely useful for attaching small moss portions to hardscape because it sets quickly and does not require a permanent mechanical fastener. Gel is generally easier to control than thin liquid adhesive because it stays closer to the application point.
Use a small bead at the attachment point rather than coating the entire moss surface. Press the moss into the gel briefly and allow the adhesive to cure according to its product instructions before exposing the installation to normal water flow.
Once cured, cyanoacrylate is commonly used for aquarium and terrarium hardscape attachment. The important practical limitation is that excessive adhesive can create a rigid, visible spot and may prevent moss from making broad contact with the substrate.
- Use only a small amount at each attachment point.
- Avoid coating growing surfaces unnecessarily.
- Use the adhesive according to its product label.
- Provide appropriate ventilation while applying uncured adhesive.
- Allow the adhesive to cure before returning the installation to its intended wet environment.
Cotton Thread vs Fishing Line
Thread and fishing line attach moss mechanically rather than chemically. Cotton thread can be useful when temporary binding is desirable because it can gradually weaken as the moss establishes. Fishing line is more durable and can hold moss securely for longer, but it can remain visible and may need to be removed if the moss does not eventually conceal it.
| Attachment Method | Main Advantage | Main Limitation | Best Use |
|---|---|---|---|
| Cyanoacrylate gel | Fast and precise attachment | Can leave visible hardened spots if overused | Small portions on hardscape |
| Cotton thread | Temporary mechanical support | Can weaken before full establishment | Thin moss mats on textured surfaces |
| Fishing line | Strong and durable | Can remain visible | Vertical surfaces needing long-term restraint |
| Stainless steel mesh | Distributed mechanical support | More visible and physically complex | Large mats and removable panels |
Use the attachment method that matches the geometry of the surface. A small patch on a rock rarely needs mesh, while a large removable moss panel can benefit from distributed support.
Stainless Steel Mesh for Moss Panels
Fine stainless steel mesh can hold moss against broad surfaces without requiring adhesive at every point. It is particularly useful when creating removable moss panels or covering irregular vertical sections.
The mesh should hold the moss in contact with the substrate without compressing it into an airtight layer. Leave enough openness for water and air to move through the growing material. Secure the mesh so that it cannot shift and expose or trap livestock where the paludarium contains animals.
Mesh also provides a maintenance advantage: a removable panel can be taken out for trimming, cleaning, inspection, or replacement without dismantling the entire hardscape.
Dry-Start Method vs Moss Slurries
The dry-start method (DSM) establishes moss under high humidity while the growing surface remains substantially above standing water. A moss slurry instead distributes small fragments or blended moss material over a damp substrate in the hope that those fragments establish across the surface.
DSM provides greater control over the placement and hydration environment because the moss remains attached to a defined surface while humidity limits drying. A slurry can cover irregular surfaces quickly, but distribution may be less predictable and excess organic material can create localized decay if the surface stays excessively wet.
| Method | Primary Mechanism | Strength | Common Risk |
|---|---|---|---|
| Dry-start method | High humidity with damp but non-flooded substrate | Controlled establishment and attachment | Stagnant sealed air and excessive condensation |
| Moss slurry | Small fragments distributed over a damp surface | Fast coverage of irregular surfaces | Uneven establishment and organic buildup |
| Submerged attachment | Continuous water contact | Direct integration into aquatic hardscape | Algae competition and detachment |
Dry-Start Method Workflow
- Attach or spread a thin moss layer over the prepared surface.
- Moisten the growing surface without creating standing water over the moss.
- Maintain high humidity using a suitable enclosure or cover.
- Provide moderate, appropriate light.
- Vent periodically to prevent completely stagnant air.
- Inspect for drying, algae, mold, and localized brown patches.
- Increase ventilation and adjust moisture delivery as the moss establishes.
- Acclimate the established moss gradually if the enclosure will later be flooded or opened to substantially drier air.
Hydration Physics: How Moss Receives Water
Moss does not need every part of its surface to be continuously sprayed. What matters is whether water reaches the growing material at a useful frequency and whether excess moisture can dissipate.
Three common delivery mechanisms are capillary wicking, direct waterfall splash, and active misting. They produce different spatial and temporal moisture patterns.
False-bottom / sponge core
↓
Capillary path → damp substrate → moss

Waterfall return
↓
Controlled splash → wetting pulse → drainage / evaporation

Misting system
↓
Fine droplets → surface hydration → evaporation / drainage
Capillary Wicking From False-Bottom or Sponge Cores
Capillary wicking moves water through small pores and narrow channels in a porous material. A sponge, wick, porous substrate, or similar core can therefore keep an adjacent moss surface damp without repeatedly spraying its entire surface.
The effectiveness of wicking depends on pore structure, contact area, vertical distance, water availability, gravity, and evaporation. The moss must actually contact a material capable of transmitting water; an empty cavity beneath a false bottom does not automatically provide capillary hydration.
Wicking is useful where a stable background moisture level is preferred. It is less suitable when the moss must periodically dry or when the underlying reservoir remains stagnant and causes the root or attachment zone to remain permanently saturated.
Direct Waterfall Splash
Waterfall splash produces intermittent wetting with strong spatial variation. Moss directly below a return path may receive frequent droplets while moss only a few centimeters away remains much drier.
This makes waterfall placement a design problem rather than simply a watering schedule. Redirecting flow, adding a drip edge, or changing the landing surface can control where moss becomes saturated.
For physical waterfall construction, splash control, flow paths, and service access, use the paludarium waterfall guide.
Active Misting
Misting provides programmable or manually controlled surface wetting and can distribute moisture across a wider area than a single splash point. However, frequent misting does not automatically create healthy conditions. If water accumulates faster than it can drain or evaporate, moss can remain continuously saturated.
The useful objective is consistent hydration rather than maximum wetness. Adjust mist frequency and duration according to the moss zone, airflow, temperature, surface material, and actual drying rate.
| Hydration Method | Moisture Pattern | Useful For | Primary Control |
|---|---|---|---|
| Capillary wicking | Slow, continuous background supply | Vertical damp walls and transition surfaces | Wick material, contact area, water level |
| Waterfall splash | Intermittent, localized wetting | Splash-zone moss and wet hardscape | Flow path, landing surface, splash barriers |
| Misting | Periodic surface wetting | Broad terrestrial moss areas | Frequency, duration, nozzle coverage |
| Manual spraying | Variable pulse | Small installations and maintenance | Application frequency and volume |
How Much Light Does Paludarium Moss Need?
A practical low-light starting point for many paludarium moss placements is approximately 30–50 μmol/m²/s of PAR measured at the moss surface. This is a starting calibration range rather than a universal requirement for every moss or every fixture.
Excessive light can increase algae pressure, particularly when nutrients and moisture are abundant. More light is therefore not automatically a better moss strategy. If growth is sparse, first check whether moisture, attachment, temperature, carbon availability, and airflow are limiting before substantially increasing intensity.
Light changes substantially across a paludarium because of fixture height, glass or acrylic covers, water depth, hardscape shading, condensation, and distance from the fixture. The paludarium lighting guide covers PAR gradients and optical effects in greater detail.
Low-Light Calibration and Algae Control
- Measure or estimate PAR at the actual moss surface rather than at the fixture.
- Start around 30–50 μmol/m²/s for a low-light moss zone.
- Maintain a consistent photoperiod rather than compensating for low intensity with excessively long illumination.
- Inspect algae coverage before increasing intensity.
- Improve nutrient and organic-load management if algae consistently outcompetes moss.
- Increase light only when other limiting factors have been addressed and the moss still shows insufficient growth.
Airflow and Mold Prevention
Moss likes moisture, but a sealed pocket of wet air around a dense moss mat can become a poor environment for healthy growth. Stagnant air reduces evaporation and gas exchange and can leave dead organic material wet for extended periods.
Airflow should not be interpreted as drying the entire paludarium. The goal is gentle air exchange that prevents persistent stagnant pockets while maintaining the moisture level required by the moss.
- Provide an air path through closed canopies and behind dense hardscape.
- Avoid packing moss into deep cavities with no ventilation.
- Remove dead leaves and decaying moss from wet pockets.
- Vent sealed dry-start enclosures periodically.
- Reduce excessive misting when surfaces remain continuously wet.
- Inspect areas behind vertical panels where moisture can remain trapped.
Why Does Paludarium Moss Turn Brown?
Brown moss can result from several different conditions, including transition stress, prolonged drying, excessive saturation, poor airflow, insufficient or excessive light, algae competition, physical detachment, or tissue decay. Color alone is therefore not enough to diagnose the problem.
First inspect the texture. Firm brown growth may be stressed or senescent, while soft, slimy, foul-smelling, or rapidly disintegrating material is more consistent with active decay.
| Brown Moss Pattern | Possible Cause | First Check |
|---|---|---|
| Dry, brittle patches | Insufficient hydration | Wicking, misting, airflow, and local humidity |
| Soft, dark, slimy patches | Excessive saturation or decay | Drainage, stagnant air, and decomposing material |
| Green moss covered by brown film | Algae or debris competition | Light, nutrients, organic buildup, and cleaning |
| Patch detaches from hardscape | Poor initial attachment or substrate disturbance | Attachment points and water flow |
| Older growth browns while fresh growth appears | Normal turnover or environmental adjustment | New growth and overall tissue firmness |
If browning progresses into slimy tissue, foul odor, crown or plant-base decay, or widespread tissue breakdown, use the paludarium plants melting guide for the diagnostic and recovery protocol.
How to Recover Browning Moss
- Inspect the moss closely and separate firm viable growth from soft or decomposing material.
- Remove slimy, foul-smelling, or clearly dead sections.
- Check whether the surface is drying too far between hydration events.
- Check for continuous saturation and poor drainage.
- Open stagnant air pockets and improve gentle air exchange.
- Inspect for algae or organic debris covering living moss.
- Verify that light remains appropriate for the zone.
- Stabilize the environment and monitor fresh growth before making repeated major changes.
Cleaning Algae From Moss
Algae can grow over moss when light, nutrients, moisture, and dissolved resources favor algae faster than moss. Aggressive cleaning can remove the moss along with the algae, so mechanical control should be gentle.
- Reduce excess light if the moss is receiving substantially more than required.
- Remove visible algae manually using tweezers, a soft brush, or careful rinsing where appropriate for the zone.
- Remove trapped organic debris.
- Improve water movement or airflow if the area is stagnant.
- Check whether excessive nutrient inputs are contributing to persistent algae growth.
- Allow the moss to re-establish before repeatedly increasing light or chemical treatments.
Do not scrub delicate moss aggressively simply to make the installation look clean. Preserving viable growth is more important than removing every visible algae strand in one maintenance session.
Best Moss for a Vertical Drip Wall
Vertical drip walls place unusual demands on moss because the surface can receive continuous or highly localized water flow. A suitable choice should tolerate the intended moisture pattern and be capable of attaching securely to the surface.
Java Moss, Christmas Moss, Phoenix/Fissidens types, Flame Moss, and Weeping Moss can all be considered in paludarium designs, but their actual performance depends on whether the installation is terrestrial, splash-dominated, or submerged. The comparative matrix below is a planning tool rather than a substitute for species-specific profiles.
| Moss Type | Growth Habit | Attachment Strength | Moisture Tolerance | Useful Zones |
|---|---|---|---|---|
| Java Moss | Fine, spreading, branching mat | High once established on suitable surfaces | High | Submerged, splash, damp transition |
| Christmas Moss | Branched, layered growth with triangular appearance | Moderate to high | High with appropriate hydration | Submerged, splash, humid terrestrial surfaces |
| Phoenix / Fissidens types | Fine, compact, upright or feathered growth | Moderate | Moderate to high depending on species and form | Damp terrestrial, transition, submerged |
| Flame Moss | Upright, twisting vertical growth | Moderate | Moderate to high | Submerged and humid vertical surfaces |
| Weeping Moss | Trailing or downward-oriented growth | Moderate | Moderate to high | Vertical hardscape, splash, submerged |
For an exposed vertical drip wall, prioritize secure attachment, controllable water distribution, and airflow. A moss that tolerates wet conditions can still fail if the drip path physically dislodges it before it establishes.
Moss Comparison Matrix for Paludarium Planning
| Moss Type | Growth Habit | Attachment Strength | Moisture Tolerance | Zone Suitability |
|---|---|---|---|---|
| Java Moss | Fine spreading mat | High | High | Submerged, splash, transition |
| Christmas Moss | Layered branched growth | Moderate to high | High | Submerged, splash, humid terrestrial |
| Phoenix / Fissidens types | Compact fine growth | Moderate | Moderate to high | Transition, humid terrestrial, submerged |
| Flame Moss | Upright twisting growth | Moderate | Moderate to high | Vertical and submerged placements |
| Weeping Moss | Trailing growth | Moderate | Moderate to high | Vertical, splash, submerged |
Maintaining Moss on Vertical Hardscape
- Inspect attachment points after the first several watering or flow cycles.
- Trim excessive thickness before the mat becomes densely packed.
- Remove debris caught inside the moss.
- Check the rear surface for persistent stagnant moisture.
- Redirect concentrated splash if it physically erodes or detaches the moss.
- Keep light consistent rather than repeatedly changing intensity.
- Remove dead patches before they become reservoirs for decomposing organic material.
Submerged Moss Maintenance
Submerged moss can receive continuous hydration, but it remains exposed to algae, sediment, debris, and mechanical flow. A submerged mat that appears healthy above the waterline may behave differently once fully submerged because its gas-exchange environment changes.
When moving moss between terrestrial and aquatic growth, expect some acclimation rather than assuming the existing form will perform identically underwater. The emersed vs submerged plants guide explains the physiological basis of growth-form changes.
How Thick Should a Moss Layer Be?
Use the thinnest layer that provides reliable visual coverage and adequate attachment. Thin layers expose more of the moss to water and air and reduce the chance of creating a permanently wet interior.
When a surface requires a thicker visual mass, build it progressively. Allow the initial layer to establish before adding additional material rather than compressing a large volume into one installation.
Paludarium Moss Design Checklist
- Choose the intended terrestrial, splash, transition, or submerged zone first.
- Match the attachment method to the hardscape geometry.
- Use small cyanoacrylate gel attachment points when adhesive is appropriate.
- Use cotton thread, fishing line, or stainless steel mesh when distributed mechanical restraint is more suitable.
- Keep moss spread thin enough for water and air to reach the growing material.
- Use DSM when controlled humid establishment is useful.
- Use slurry techniques cautiously on irregular surfaces where distribution can be controlled.
- Design hydration around wicking, splash, misting, or a deliberate combination.
- Start low-light moss zones around 30–50 μmol/m²/s PAR and adjust from observed performance.
- Maintain gentle air exchange through closed canopies.
- Remove algae, dead tissue, and trapped debris before they become persistent moisture traps.
- Use the paludarium waterfall guide for splash-zone engineering.
- Use the paludarium lighting guide for PAR and fixture calibration.
- Use the paludarium plants guide for broader flora selection.
- Use the paludarium plants melting guide when browning progresses into active tissue decay.
Final Paludarium Moss Framework
Successful paludarium moss culture is primarily a moisture-distribution and microclimate problem. Secure attachment keeps the growing material in contact with the hardscape, while wicking, splash, and misting determine how water reaches it. Light should be sufficient for dense growth without unnecessarily increasing algae pressure, and airflow should prevent stagnant wet pockets without drying the moss.
When moss browns, diagnose the physical environment before replacing the entire patch. Check whether it is too dry, permanently saturated, poorly ventilated, algae-covered, detached, overheated, or undergoing a normal environmental transition. Correct the dominant cause, remove genuinely decomposing material, and allow healthy new growth to establish.
Frequently Asked Questions
How do I recover browning moss in a paludarium?
Inspect the texture first. Remove slimy or decomposing sections, then check hydration consistency, stagnant air, algae coverage, attachment, temperature, and light. Firm older brown growth may be stressed or senescent, while soft or foul-smelling tissue requires a decay-focused response.
Is superglue gel safe for attaching moss in a paludarium?
Cyanoacrylate gel is commonly used to attach aquarium and terrarium plants to hardscape. Use a small amount, avoid coating the growing surface, provide ventilation during application, and allow the adhesive to cure according to its product instructions before normal wet operation.
Is wicking better than spraying moss in a paludarium?
Neither is universally better. Wicking provides steady background moisture, while spraying or misting provides discrete hydration events. Choose based on the moss zone, drying rate, airflow, drainage, and whether continuous saturation would create problems.
What is the best moss for a vertical drip wall?
A suitable drip-wall moss needs secure attachment and tolerance for the intended moisture pattern. Java Moss, Christmas Moss, Phoenix/Fissidens types, Flame Moss, and Weeping Moss can all be considered, but water distribution and airflow often matter as much as moss choice.
How do I clean algae from paludarium moss without killing it?
Reduce excessive light if appropriate, remove algae gently by hand or with a soft tool, clear trapped debris, and improve stagnant water or air conditions. Avoid aggressive scrubbing or repeated chemical treatments that can remove viable moss along with the algae.
Explore More
Related Articles
Related Plant Guides
No specific plant guides found matching this topic.
Recommended next actions
Continue Exploring
Dive deeper into related plant care tools and profiles.
Topic Guide
What Is a Paludarium? Design, Anatomy, and Ecosystem Setup
Learn what a paludarium is, how land and water zones work together, and how to plan drainage, circulation, substrate, planting, and maintenance.
Topic Guide
Paludarium Plants: Choosing Plants for Land & Water Zones
Learn how to choose paludarium plants by land, emergent, humid, and aquatic zones, with guidance on light, moisture, growth, and maintenance.
Topic Guide
Paludarium Waterfall Guide
A practical construction guide for paludarium waterfalls covering cascading flow paths, expanding-foam baffles, slate tiers, structural support, splash mitigation, acoustic dampening, mold prevention and hidden plumbing service access.
Topic Guide
Humidity
Learn everything about humidity for your indoor and aquarium plants. Expert care tips, troubleshooting, and related guides.
Topic Guide
Misting
Learn everything about misting for your indoor and aquarium plants. Expert care tips, troubleshooting, and related guides.
Topic Guide
Water Quality for Houseplants
Compare tap, filtered, distilled, and rainwater for houseplants. Learn which water is best for sensitive plants and how to prevent mineral buildup.