How to Make a Wabi-Kusa: Step-by-Step Guide
Wabi-kusa is a Japanese-inspired aquascaping art form that grows aquatic and semi-aquatic plants in their emersed (above-water) state in a ball or block of moist substrate, creating a miniature living landscape. Success depends on three pillars: a substrate that holds moisture while staying aerated, plants that tolerate emersed growth, and stable humidity and lighting during the critical establishment phase. This guide covers materials, an exact recipe, step-by-step construction, plant selection, lighting, humidity, mold prevention, and long-term maintenance. Following these protocols will give you a stable, low-maintenance wabi-kusa that can be displayed open or inside a semi-closed container.
Quick Answer
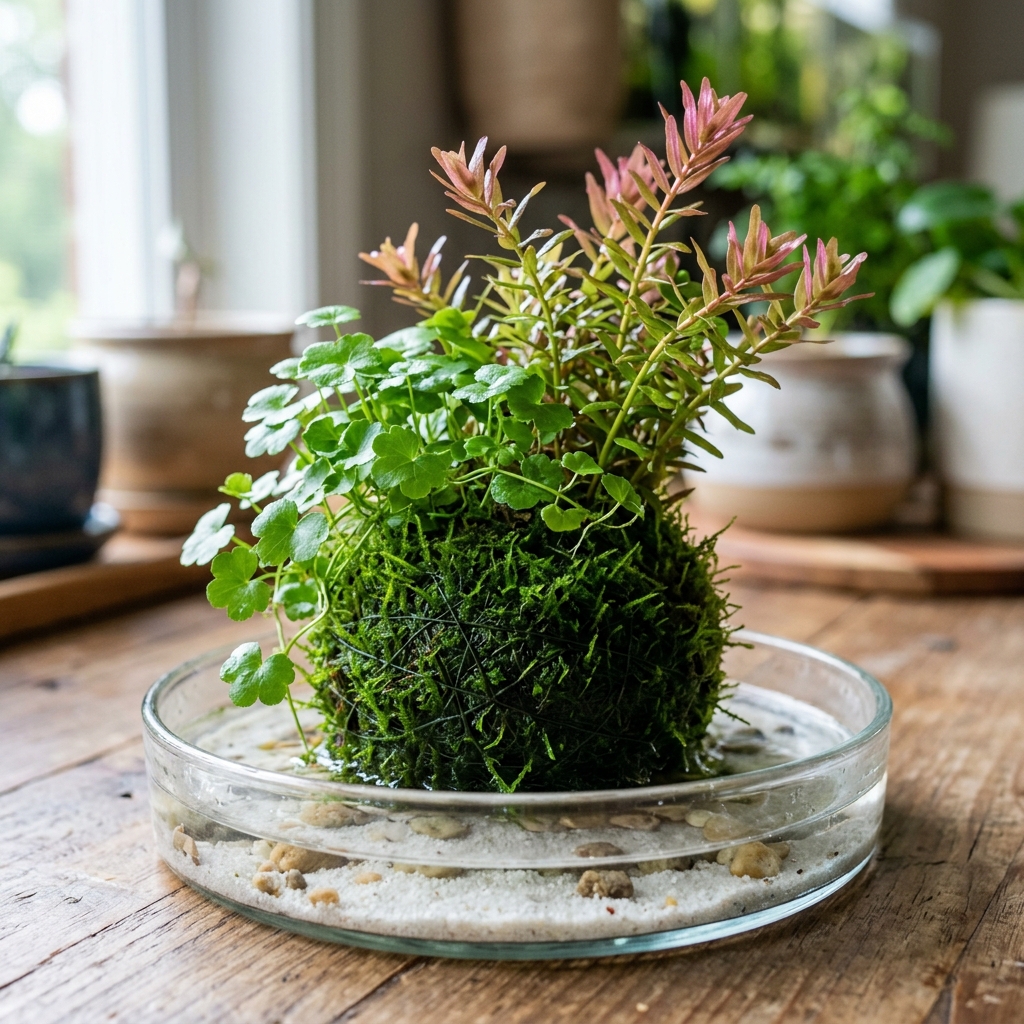
To make a wabi-kusa, mix a moisture-retentive aquasoil-based substrate (roughly 60% aquasoil, 30% fine akadama, 10% peat-free coir by volume), shape it into a firm 5-7 cm sphere with a binder such as sphagnum or fine clay, and plant 2-3 species of small emergent-tolerant aquatic plants into it. Place it in a shallow dish with 1-2 cm of water at the base, under 6500K light for 8-10 hours daily, and keep humidity high for the first 3-4 weeks before slowly acclimating.
Key Takeaways
- Use a substrate blend of about 60% aquasoil, 30% fine akadama and 10% coir by volume for a balance of moisture retention, nutrients and aeration.
- Choose emersed-tolerant species such as Hydrocotyle tripartita and Rotala rotundifolia that stay compact and root readily in damp substrate.
- Keep humidity above 85-90% for the first 3-4 weeks, then lower it gradually over 2-3 weeks to harden plants off.
- Provide 6500K full-spectrum LED lighting at roughly 80-150 PPFD at the substrate surface for 8-10 hours per day.
- Prevent mold with clean materials, adequate airflow, a thin water reservoir rather than a saturated ball, and prompt removal of dead plant matter.
What Is a Wabi-Kusa?
Wabi-kusa is a living miniature landscape in which aquatic or semi-aquatic plants are grown emersed, meaning with their leaves above water, in a moist ball or block of substrate. The name draws on the Japanese aesthetic of wabi-sabi, which values imperfection and natural simplicity, and kusa, meaning grass. Many aquatic plants are amphibious and naturally grow above water in the wild during seasonal low-water periods, which is why they thrive in wabi-kusa setups. For a broader overview of plant options, see our guide to wabi-kusa plants.
Materials You Will Need
- Substrate components: aquasoil, fine akadama, and peat-free coir (see the recipe below).
- Binder and wrap: long-fibre sphagnum moss or a few strips of unbleached cotton thread for shaping.
- Plants: 2-4 small portions of emersed-grown aquatic plants, preferably tissue culture or well-rinsed cuttings.
- Container: a shallow, non-porous dish or glass bowl, 8-12 cm wide, ideally with a clear lid or cloche for the first weeks.
- Tools: fine-tip tweezers, scissors, a spray bottle with dechlorinated or RO water, and a clean mixing tray.
- Lighting: a 6500K full-spectrum LED with adjustable height.
Substrate Recipe (by Volume)
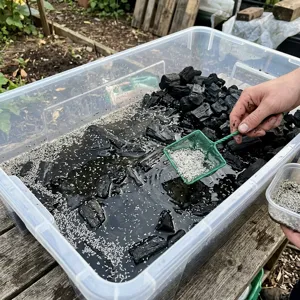
A balanced substrate must hold moisture, supply nutrients, and keep enough air pockets to prevent root rot. A reliable starter mix is 60% aquasoil, 30% fine akadama, and 10% coir fines, all measured by volume. Measure with the same cup or scoop for each component, for example 6 scoops of aquasoil, 3 scoops of akadama, and 1 scoop of coir. If you want exact quantities for a specific ball size, use our Wabi-Kusa Substrate Calculator, and for deeper recipe variations read the wabi-kusa substrate recipe guide.
Rinse the akadama briefly to remove dust, but do not over-wash the aquasoil because it carries nutrients that you want to retain. Pre-moisten the whole mix with dechlorinated or RO water until it feels like damp clay. When you squeeze a handful, it should hold together without dripping more than a drop or two of water.
Step-by-Step Construction
- Mix the substrate. Combine the components in a tray and add water gradually, kneading until the mix is cohesive and sticky.
- Form the base. Roll a ball 5-7 cm in diameter (about the size of a tennis ball or smaller). Press firmly to eliminate large air gaps, but do not compress it so tightly that it loses all aeration.
- Wrap the ball. Cover the outer surface with a thin layer of damp long-fibre sphagnum or a selection of aquatic mosses and secure it with a few loose turns of cotton thread. This improves structural integrity and slows surface drying.
- Prepare the plants. Remove all nutrient gel from tissue culture plants by rinsing under lukewarm water. Trim damaged roots and divide into small portions of 3-5 stems.
- Plant the ball. Use tweezers to push the roots 1-2 cm into the substrate through the moss layer. Place taller stem plants such as Rotala rotundifolia off-center and low carpeting species like Hydrocotyle tripartita around the base and sides.
- Position in the dish. Set the ball in a shallow dish and add 1-2 cm of water so the bottom third of the ball wicks moisture upward. Never submerge the entire ball.
- Establish humidity. Cover the dish with a clear lid or place it inside a ventilated cloche. Mist the plants lightly with dechlorinated or RO water.
Choosing Plants
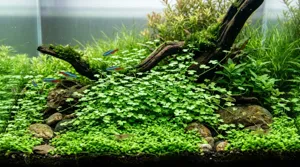
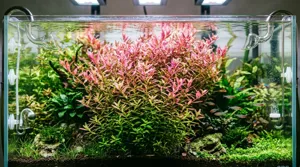
Select species that are naturally amphibious, remain compact under emersed conditions, and root quickly in moist substrate. Hydrocotyle tripartita is an excellent beginner plant because its creeping stems fill space rapidly and it tolerates lower humidity better than many carpeting species. Rotala rotundifolia adds vertical structure and develops attractive pink-red tones under strong lighting. A limited palette of 2-4 species looks more cohesive and reduces competition. Explore the full list in our wabi-kusa plant guide.
Lighting and Humidity
Use a full-spectrum 6500K LED delivering approximately 80-150 PPFD at the substrate surface for 8-10 hours daily. Higher intensity accelerates growth but also raises evaporation and algae pressure, so raise the light if the substrate dries quickly or leaves show bleaching. During the first 3-4 weeks, maintain relative humidity at 85-95% with a lid or cloche, opening it for a few minutes each day for fresh air exchange. After roots have anchored and new growth appears, begin cracking the lid gradually over 2-3 weeks to harden the plants off to ambient humidity. For detailed environmental targets, see wabi-kusa lighting and humidity.
Preventing Mold
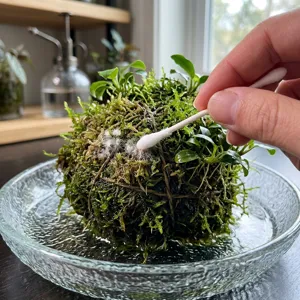
Mold is the most common failure in new wabi-kusa builds, typically appearing as white fuzzy patches on sphagnum or the substrate surface. To minimize risk, use clean tools, avoid stagnant air, keep the ball moist but not waterlogged, remove any decaying leaves promptly, and ensure daily ventilation. If mold appears, dab the affected area with a cotton swab dampened with 3% hydrogen peroxide, improve airflow, and reduce misting. Compare strategies in our wabi-kusa mold prevention guide.
Ongoing Care and Maintenance
- Water: refill the reservoir with dechlorinated or RO water to maintain a 1-2 cm depth. Replace it fully every 1-2 weeks to prevent stagnation.
- Trimming: prune stem plants when they exceed the desired height, and replant the cuttings into the ball.
- Fertilization: aquasoil provides nutrients for roughly 2-3 months. After that, add a very dilute liquid aquatic fertilizer (about 1/4 of the labeled dose) to the reservoir every 2 weeks.
- Algae control: reduce light intensity or duration, and wipe the dish and ball surfaces gently if green film develops.
- Rotation: turn the dish a quarter turn weekly for even growth.
Troubleshooting
| Symptom | Likely Cause | Solution |
|---|---|---|
| Leaves melting or turning translucent | Transition from submerged to emersed growth | Maintain high humidity and trim dead leaves; new emersed leaves will emerge |
| White fuzzy mold | Poor airflow or excess moisture | Spot-treat with hydrogen peroxide and increase ventilation |
| Dry, crispy leaf edges | Humidity too low | Mist more often or partially re-cover the dish |
| Leggy, pale growth | Insufficient light | Lower the light or increase intensity toward 120-150 PPFD |
| Ball crumbling | Weak binding or over-wet substrate | Rewrap with sphagnum and reduce water level |
Related Resources
Continue with the substrate recipe deep dive, plan your plant palette in the plant selection guide, and calculate precise material quantities with the substrate calculator.
Frequently Asked Questions
How long does it take to make a wabi-kusa?
Construction takes about 30-60 minutes. The plants then need 3-4 weeks to root and establish under high humidity, and a further 2-3 weeks to harden off to ambient conditions.
What substrate should I use for a wabi-kusa?
A reliable mix is 60% aquasoil, 30% fine akadama, and 10% peat-free coir fines, all measured by volume. This combination balances moisture retention, nutrients, and aeration. See the substrate recipe guide and calculator for precise quantities.
Do I need to submerge the wabi-kusa ball in water?
No. Keep only the bottom portion in 1-2 cm of water so the substrate wicks moisture upward. Submerging the whole ball reduces oxygen in the root zone and encourages mold and root rot.
Which plants are best for a beginner wabi-kusa?
Hydrocotyle tripartita and Rotala rotundifolia are excellent beginner choices because they root readily and tolerate emersed growth. Eleocharis acicularis and Marsilea hirsuta are good additions once you gain experience.
How much light does a wabi-kusa need?
Aim for a 6500K full-spectrum LED providing roughly 80-150 PPFD at the substrate surface for 8-10 hours per day. Adjust the height of the light to balance growth against drying and algae.
Why is my wabi-kusa growing mold?
Mold usually results from stagnant air, excess moisture, or decaying plant material. Improve ventilation, reduce misting, remove dead leaves, and spot-treat with a cotton swab dampened with 3% hydrogen peroxide.
Can I keep a wabi-kusa in a closed container?
A closed container is helpful during the first 3-4 weeks to hold humidity at 85-95%, but long-term closed cultivation increases mold risk. Provide daily ventilation and eventually transition to a partially open or open display.
Why are the leaves melting after I planted my wabi-kusa?
Plants grown submerged or in tissue culture often shed their old leaves when moved to emersed conditions. This is normal. Maintain high humidity and trim dead tissue, and new emersed leaves should emerge within 1-3 weeks.
What water should I use for a wabi-kusa?
Use dechlorinated tap water or RO water, ideally with low total dissolved solids. Hard or heavily mineralized water can leave deposits on the substrate surface and affect sensitive plants.
Sources & References
-
Source: missouribotanicalgarden.org
Type: horticultural-reference
-
Source: adana.co.jp
Type: horticultural-reference
-
Source: rhs.org.uk
Type: horticultural-reference
Explore More
Related Articles
Related Plant Guides
Recommended next actions
Continue Exploring
Dive deeper into related plant care tools and profiles.
Calculator
Wabi-Kusa Substrate Calculator: Ball Volume & Soil Ratios
Calculate exact volume ratios of aquasoil, akadama, coir, and bentonite clay for any wabi-kusa ball diameter, plus sphagnum wrap surface area.
Plant Guide
Rotala rotundifolia
Rotala rotundifolia care guide: emersed and submerged forms, light, CO2, red coloration, wabi-kusa use, propagation, and troubleshooting for stems.
Topic Guide
Wabi-Kusa Lighting and Humidity: PPFD, Phases and Vessels
Wabi-kusa lighting and humidity: 6500K LED at 80-150 PPFD, 8-10 hours, three-phase humidity hardening, vessel comparison and misting rules.
Topic Guide
Wabi-Kusa Mold Prevention: Ventilation, Treatment and Springtails
Wabi-kusa mold prevention: stop white fuzz in weeks 1-4 with ventilation, 3% hydrogen peroxide spot treatment, chamomile mist and springtails.
Topic Guide
Best Wabi-Kusa Plants: Carpets, Stems, Epiphytes and Mosses
Best wabi-kusa plants by role: carpets, stems, epiphytes and mosses, with emersed growth needs, transition speed, planting tips and troubleshooting.
Topic Guide
Wabi-Kusa Substrate Recipe: Ratios, Binders and Keto Soil Substitutes
Wabi-kusa substrate recipe by volume: akadama, peat-free coir, bentonite binder, and keto soil substitutes, with ratios, prep steps and troubleshooting.