DIY Isopod Substrate Recipe: Ratios, Ingredients & Preparation
Terrestrial isopods are detritivores that ingest the material they live in, so a good substrate works as a long-lasting food source and a physical habitat at once. This guide explains why plain coco coir and potting soil fail, then gives a baseline formulation by volume built from decayed white-rot wood, fermented flake soil or hardwood compost, crushed hardwood leaves, worm castings, calcium carbonate and horticultural charcoal. It covers sourcing, freezing versus baking of foraged material, moisture testing, genus-specific adjustments for Armadillidium, Porcellio and Cubaris, and a maintenance schedule that prevents frass buildup. Use it with the terrarium setup guide and the substrate calculator to scale a batch to your enclosure.
Quick Answer
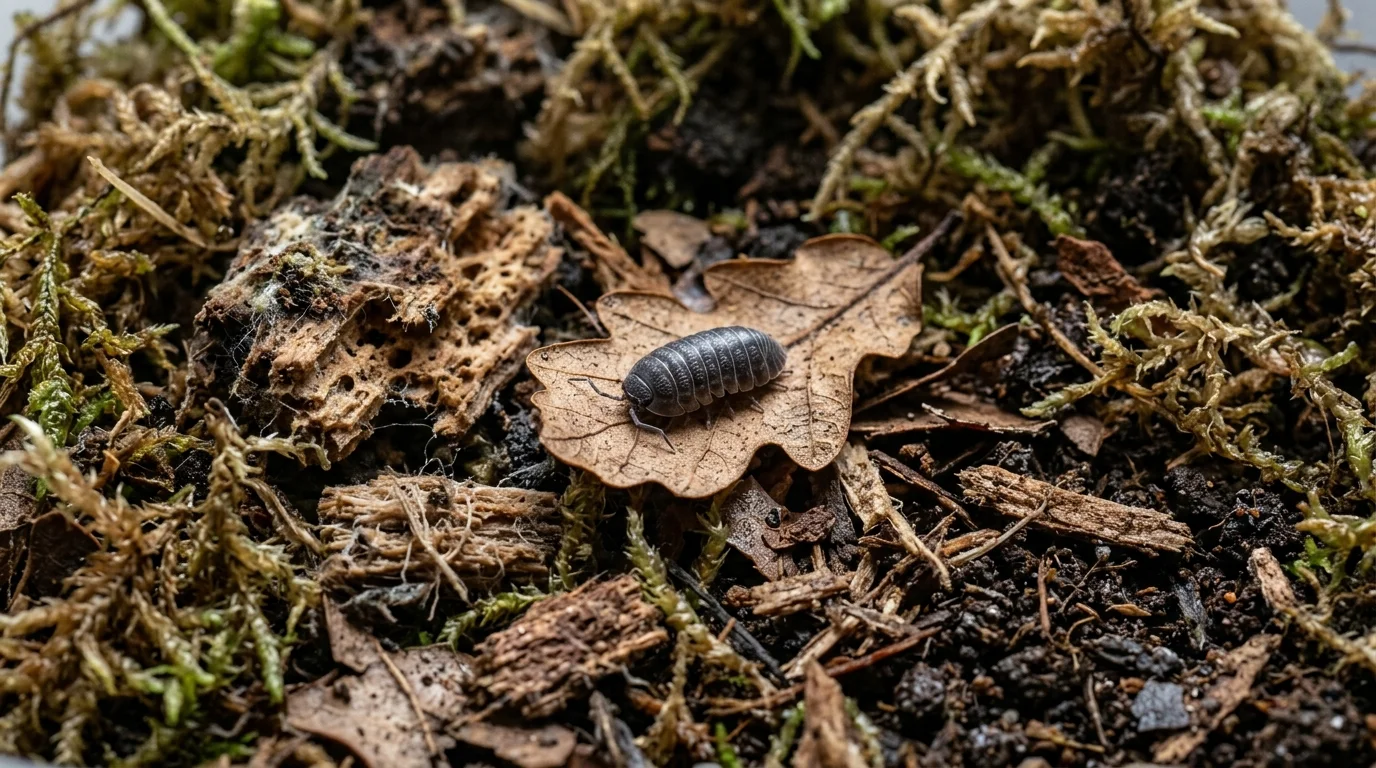
A reliable isopod substrate, all measured by volume, is 35% decayed white-rot wood, 25-30% fermented flake soil or hardwood compost, 15-20% crushed aged hardwood leaves, 10% worm castings, 5% calcium carbonate (limestone powder or oyster shell flour) and 5% horticultural charcoal. Moisten it to field capacity (moist, fluffy, clumps on a gentle squeeze and releases no standing water), then layer 2-3 cm of whole leaf litter on top. Isopods eat their substrate, so it must be consumable food, not inert potting soil or plain coco coir.
Key Takeaways
- Isopods eat their substrate, so build it from consumable carbon and microbial food (decayed white-rot wood, fermented flake soil, hardwood leaves) rather than inert coco coir or fertilized potting soil.
- A baseline mix by volume is 30-40% decayed white-rot wood, 25-30% fermented flake soil or hardwood compost, 15-20% crushed hardwood leaves, 10% worm castings, 5% calcium carbonate and 5% horticultural charcoal.
- Keep worm castings at about 10% (never above 10-15%), because fine castings compact the mix, hold too much water and reduce air spaces.
- Freeze foraged wood and leaves for at least 1-2 weeks, or bake them gently, to kill spiders, centipedes and mites without sterilizing away the decomposition needed to feed the colony.
- Test moisture at field capacity (fluffy, clumps on a gentle squeeze, no drops released) and refresh 20-30% of the substrate every 3-6 months to prevent frass and ammonia buildup.
Substrate Is Food, Not Just Dirt
Terrestrial isopods are detritivores that actively ingest the material they live in. Their gut microbiome breaks down partly decomposed lignin and cellulose, and their frass (droppings) feeds fungi and bacteria that in turn feed the colony. A substrate for isopods therefore has to be consumable nutrition, not only a surface to stand on. Inert coco coir, sand and standard potting soil provide little digestible food, and many potting mixes also contain slow-release fertilizer, wetting agents or perlite that can harm animals. All ratios in this guide are by volume, measured with the same scoop or bucket, using lightly packed, pre-moistened ingredients. For the enclosure that holds the mix, see the isopod terrarium setup guide.
The Baseline Formulation
The following mix suits most common species. Combine the ingredients by volume:
- 30-40% decayed white-rot wood. Soft, crumbly oak, beech or poplar that is partially broken down by white-rot fungi. It supplies lignin and cellulose in a form the isopod gut microbiome can digest, and it gives structure and cover.
- 25-30% fermented flake soil or hardwood compost. This is a long-term microbial and carbon food source. Flake soil is a fermented hardwood product sold for beetle and isopod keeping; well-aged hardwood compost is an alternative. Avoid composts containing manure, fertilizers or conifer material.
- 15-20% crushed aged hardwood leaves. Oak, beech or magnolia leaves, crushed to 5-15 mm fragments. They add fibre, tannin-aged food and open structure.
- 10% worm castings. A source of beneficial microorganisms, organic matter and trace minerals. Keep them to about 10%, and never above 10-15%, because fine castings compact, hold excess water and reduce air spaces.
- 5% calcium carbonate. Limestone powder or oyster shell flour supplies the calcium needed for every molt. It also helps balance hemolymph chemistry. Use pure, additive-free calcium carbonate, not quicklime or hydrated lime, which are caustic.
- 5% horticultural charcoal or biochar. Unfertilized charcoal adds micro-porosity and aeration and gives springtails a habitat, which supports the cleanup crew described in the springtail culturing guide.
Example: for a 10-litre batch, measure about 3.5 litres of decayed wood, 2.5-3 litres of flake soil or compost, 1.5-2 litres of crushed leaves, 1 litre of castings, 0.5 litre of calcium carbonate and 0.5 litre of charcoal, then adjust the wood or compost so the total reaches 100%. To convert the dimensions of your enclosure into a total batch volume, use the isopod substrate calculator.
Why 100% Coco Coir Fails
Coco coir holds moisture and looks tidy, but it is mostly lignin-rich fibre that few isopods digest, and it carries almost no microbial life or calcium. In a coir-only enclosure, animals graze on whatever leaf litter and wood is present, the substrate itself offers no nutrition, and growth and breeding slow down. Coir also can hold excess salts if it is not rinsed. It can be a minor ingredient (up to about 10-15%) for moisture retention, but it should never be the whole mix.
Sourcing and Pest Treatment
Wild-foraged wood and leaves are free and effective, but they bring hitchhikers such as spiders, centipedes and predatory mites. Collect only from areas without pesticides, herbicides or road runoff, and avoid conifers, which contain resins. Select wood that is already soft and punky with white or cream-coloured fibre, and leaves that are brown, dry and partly broken down.
- Freeze first. Seal the material in bags and freeze at -18 °C (0 °F) for 1-2 weeks. Thaw it and refreeze for a second cycle if you are worried about pests. Freezing kills most arthropods and keeps much of the beneficial microbial community.
- Bake only if needed. For stubborn infestations, bake damp material at 90-100 °C (195-210 °F) for 30-45 minutes. Do not over-bake: temperatures much above this sterilize the material and remove the beneficial decomposers that make it useful, and dry-baked wood is harder for animals to chew.
- Rehydrate and age. Soak the treated material in dechlorinated water, drain it and let it sit in a covered bin for a few weeks. Surface mold is common at first and is usually harmless; discard anything that smells sour or putrid.
Compare the methods in the third table above. The goal is to remove predators while keeping the living decomposition system intact.
Mixing and the Field-Capacity Test
- Blend dry or lightly damp ingredients first. Mix the wood, flake soil, leaves, castings, calcium carbonate and charcoal in a large tub until the mix looks even.
- Add dechlorinated or rainwater gradually. Stir as you add water until the mix is moist throughout.
- Squeeze a handful gently. At field capacity the mix is moist, fluffy and clumps loosely, and then breaks apart easily. No drops of standing water should come out.
- Correct the moisture. If water drips, add dry wood or charcoal in small volume steps; if it crumbles and feels dusty, add water a little at a time.
- Rest for 24-48 hours. A covered rest lets the moisture even out and gives the mix time to settle before you add animals.
A mix at field capacity holds air spaces as well as water, which prevents anaerobic conditions. Keep the surface drier than the bottom layers and use a damp zone, as explained in the terrarium setup guide.
Genus-Specific Adjustments
The second table above lists the key changes. Armadillidium tolerate drier conditions, so use coarser wood and a little more charcoal for drainage. Porcellio are fast, hungry breeders, so keep calcium a little higher and make sure there is leaning bark for climbing. Cubaris need steady humidity, finer and softer rotted wood for burrowing and a calcium share at the upper end of the range, along with 8-10 cm of depth. See the rubber ducky isopod care guide for details on this demanding group.
Calcium: Limestone Powder, Oyster Shell and Cuttlebone
Mix 5% calcium carbonate into the substrate so that every layer contains it, and also leave a solid piece on the surface. Limestone powder and oyster shell flour are inexpensive and long-lasting. Cuttlebone is a good surface supplement that animals can graze on, but it is less practical to grind into the whole mix. A mix of both approaches, powder in the substrate and a chunk on top, gives continuous calcium without wasting material.
Layering, Topping and Fractional Refreshes
Spread a 2-3 cm layer of whole leaf litter over the substrate as a sacrificial canopy. It is food, cover and a humidity buffer, and it is replaced monthly. Over time, frass builds up in the substrate and releases ammonia and salts, which can stress the colony and drive fungus gnats and mites. To prevent this, perform a fractional refresh every 3-6 months: remove 20-30% of the old substrate from the dry end, replace it with fresh mix and top up the leaf litter. Avoid full replacement, which destroys microbial communities and the burrows animals depend on. Balance springtails and other cleanup organisms using the bioactive cleanup crew guide.
What to Avoid
- Commercial fertilizers and potting mixes with slow-release fertilizer, wetting agents, pesticides or perlite.
- Conifer wood, needles and resinous bark, which can be toxic.
- Fresh green leaves and raw wood, which mold and may harbor pests.
- Treated, painted or pressure-treated wood.
- Heavy additions of worm castings, manure or kitchen compost, which compact and sour the mix.
Troubleshooting Summary
| Symptom | Likely cause | Quick fix |
|---|---|---|
| Substrate is dense, wet and smelly | Too many castings or fines, poor ventilation | Fold in dry wood, leaves and charcoal; improve airflow |
| Fungus gnats appear | Wet substrate with fresh organic matter | Dry the surface, freeze new material, add mesh and springtails |
| Slow growth or poor breeding | Low-nutrition mix, such as mostly coir | Add decayed wood, flake soil and leaves |
| Soft or deformed shells | Calcium shortage | Mix in calcium carbonate and add a limestone chunk |
| Mite blooms | Overfeeding or wet, unfrozen material | Reduce food, dry the surface, add predatory mites only if necessary |
Related Resources
Continue with the isopod terrarium setup guide, size your batch with the isopod substrate calculator, adapt the mix for rubber ducky isopods, culture companions with the springtail guide and balance the ecosystem with the cleanup crew guide.
Frequently Asked Questions
Why does 100% coco coir fail for isopods?
Coir holds water but offers little digestible nutrition, microbial life or calcium. Isopods eat their substrate, so a coir-only enclosure leads to slow growth, poor breeding and dependence on supplemental feeding. Use coir as a minor moisture-holding ingredient (about 10-15% at most) alongside decayed wood, flake soil and leaves.
Should I bake or freeze leaf litter and wood?
Freezing is the first choice: seal the material and freeze it at -18 °C (0 °F) for 1-2 weeks, ideally twice, to kill spiders, centipedes and most mites while preserving beneficial microbes. Bake only when necessary, damp and at 90-100 °C (195-210 °F) for 30-45 minutes. Hot, dry baking sterilizes the material and removes the decomposers that make it useful.
How often should I refresh isopod substrate?
Do a fractional refresh every 3-6 months: remove 20-30% of the old substrate, usually from the dry end, replace it with fresh mix and top up the leaf litter. This clears frass and ammonia without destroying burrows and microbial communities. Replace the top leaf litter monthly. Avoid replacing all the substrate at once.
Is cuttlebone as good as limestone powder?
Cuttlebone is a useful surface supplement that animals graze directly, but it is hard to mix evenly into the whole substrate. Limestone powder or oyster shell flour (about 5% by volume) distributes calcium through every layer. Using both, powder in the mix and a solid piece on top, gives the most reliable supply.
Can I use commercial fertilizers or standard potting soil?
No. Many potting mixes contain slow-release fertilizer, wetting agents, pesticides or perlite, and fertilizers raise salts and ammonia. Isopods ingest their substrate, so these additives can poison them. Build the mix from untreated decayed wood, hardwood compost or flake soil, leaves and castings instead.
How much worm castings should I add?
About 10% by volume, and never more than 10-15%. Castings add beneficial microbes and trace minerals, but they are fine and compact easily. Too much produces a dense, wet substrate with poor airflow, which encourages gnats, mold and anaerobic conditions.
What does field capacity feel like?
The mix should feel moist and fluffy, hold together as a loose clump when you squeeze it gently, and then break apart easily. No drops of standing water should come out. If water drips, it is too wet; if it will not clump and looks dusty, it is too dry.
Can I use pine or other softwood in the mix?
No. Conifer wood, needles and bark contain resins and aromatic compounds that can be harmful to isopods. Use hardwoods such as oak, beech, poplar, maple or birch, preferably already softened by white-rot fungi, and avoid treated or painted wood.
Why is charcoal included in the mix?
Horticultural charcoal or biochar adds micro-porosity and aeration, helps to buffer odours and gives springtails a habitat. Use about 5% by volume of unfertilized, untreated charcoal. Do not use barbecue briquettes, which contain binders and accelerants.
Can I adjust the recipe for different isopod genera?
Yes. Use coarser wood and more charcoal for drier-tolerant Armadillidium, slightly more calcium for fast-breeding Porcellio, and finer, softer wood with higher moisture retention and deeper substrate for Cubaris. See the genus-specific table above for the details.
Sources & References
-
Source: si.edu
Type: horticultural-reference
-
Source: nhm.ac.uk
Type: horticultural-reference
-
Source: rhs.org.uk
Type: horticultural-reference
Explore More
Related Articles
Related Plant Guides
No specific plant guides found matching this topic.
Recommended next actions
Continue Exploring
Dive deeper into related plant care tools and profiles.
Calculator
Isopod Substrate & Leaf Litter Calculator
Calculate exact volumes of decayed white wood, flake soil, leaf litter, worm castings, and calcium for any isopod terrarium volume or container dimensions.
Topic Guide
Bioactive Cleanup Crew Balance: Isopods and Springtails Cohabitation
Maintain the ideal isopod-to-springtail balance in bioactive terrariums: niche partitioning, crash prevention, food competition, and population control.
Topic Guide
How to Set Up an Isopod Terrarium: Ventilation & Moisture Gradients
Step-by-step isopod terrarium setup: enclosure selection, creating a moisture gradient, cross-ventilation, cork bark hides, and leaf litter depth.
Topic Guide
Building a Paludarium Land-to-Water Barrier: Drainage, Foam & Mesh
Build a leak-proof paludarium land-to-water barrier: false bottom eggcrate construction, expanding foam waterproofing, geotextile mesh, and soil wicking prevention.
Topic Guide
Cubaris sp. 'Rubber Ducky' Isopod Care & Enclosure Guide
Complete Cubaris sp. 'Rubber Ducky' care guide: limestone caves, 80-90% humidity, deep burrowing substrate, white-rot wood diet, and breeding tips.
Topic Guide
How to Culture Springtails on Charcoal: Setup, Feeding & Harvesting
Step-by-step springtail culturing on horticultural lump charcoal: setup, feeding with active dry yeast, flooding harvests, and crash prevention.