How to Set Up an Isopod Terrarium: Ventilation & Moisture Gradients
A healthy isopod enclosure is built around choice: animals must be able to move between a humid hydration zone and a dry foraging zone, because isopods breathe through gill-like pleopodal lungs that need moisture but drown or rot in saturated, stagnant conditions. This guide covers enclosure selection (acrylic displays versus modified plastic totes), hole sizing and mesh covers, the 70/30 moisture gradient, substrate depth, sacrificial leaf litter, microhabitats and the physics of cross-ventilation. It also gives genus-specific parameters for Armadillidium, Porcellio and Cubaris, a zone checklist, feeding and pest guidance, and a troubleshooting table. Combine it with the substrate recipe and cleanup crew guides for a stable, self-sustaining colony.
Quick Answer
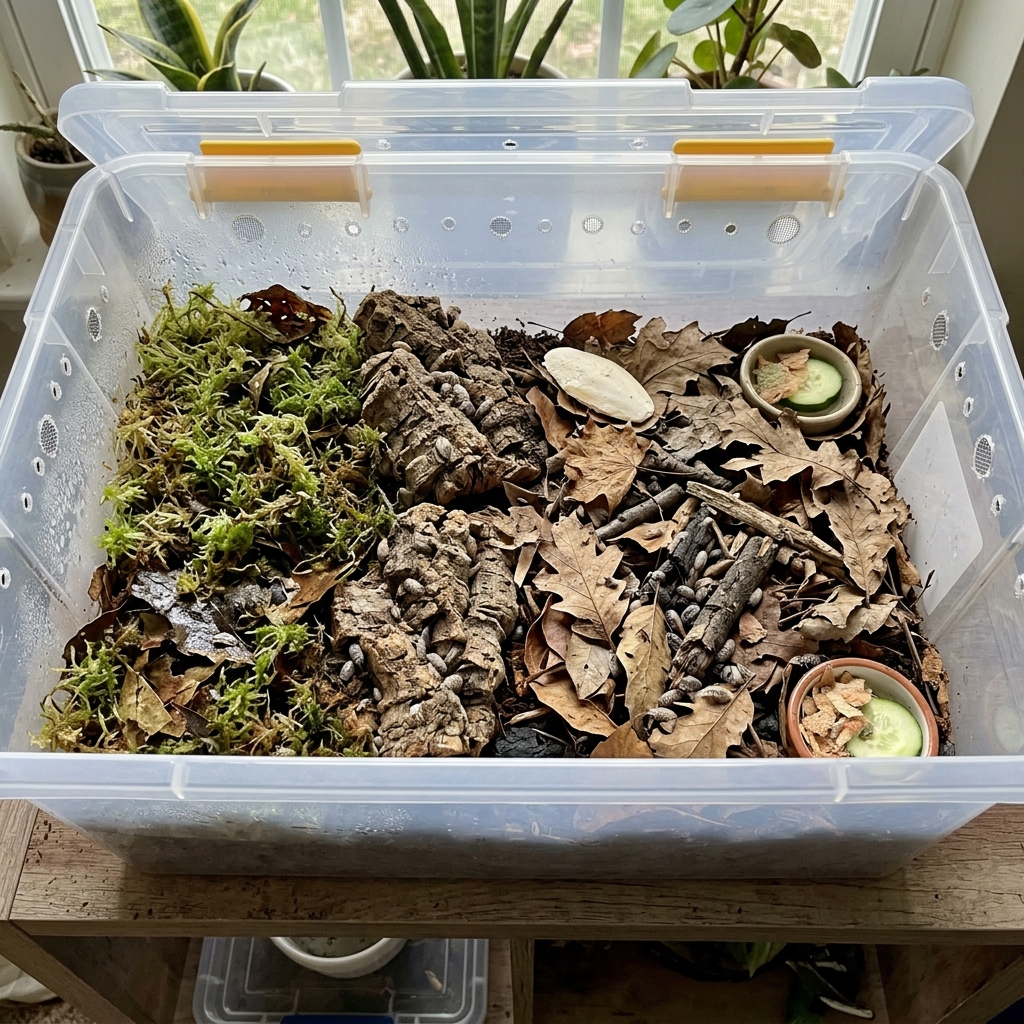
Set up an isopod terrarium in a ventilated plastic tote or acrylic enclosure with 5-8 cm of organic-rich substrate, a 2-3 cm layer of aged oak or magnolia leaf litter, and a 70/30 moisture gradient: about 30% of the floor kept damp with long-fibre sphagnum moss and the remaining 70% left dry for foraging. Add cork bark hides, decaying white-rot wood and a piece of limestone, and ventilate with low intake holes on the moist side and upper exhaust holes on the dry side so air moves without drying the whole enclosure.
Key Takeaways
- Build a 70/30 moisture gradient: a damp, sphagnum-packed hydration zone covering roughly 30% of the floor and a dry foraging zone covering the other 70%, so isopods can self-regulate.
- Use at least 5-8 cm of organic-rich substrate topped with a 2-3 cm sacrificial layer of aged hardwood leaf litter (oak, magnolia), which doubles as food, cover and humidity buffer.
- Ventilate with low intake holes on the moist side and upper exhaust holes on the dry side, covered with fine stainless or nylon mesh, so convective airflow removes stale air without desiccating the whole enclosure.
- Provide cork bark rounds, partially decayed white-rot hardwood and a piece of limestone as hides, grazing surfaces and calcium sources.
- Match humidity and ventilation to genus: Armadillidium prefer drier, well-ventilated setups, Porcellio sit in the middle, and Cubaris generally need warmer, more humid conditions with careful airflow.
What an Isopod Terrarium Has to Do
Terrestrial isopods (woodlice, pill bugs and their relatives) are crustaceans that breathe through gill-like structures called pleopodal lungs. These surfaces need moisture to exchange gases, but a saturated or stagnant enclosure promotes anaerobic substrate, mold, mites and gnats. A good setup is therefore about choice: a damp zone where animals can hydrate, a dry zone where they forage and a ventilation path that keeps the air fresh. This guide builds that enclosure step by step. For the substrate itself, see our isopod substrate recipe.
Choosing an Enclosure
Isopods do not need large or expensive housing. What matters is floor area, because they live on and in the substrate and rarely use height. Use a footprint of at least 30 × 20 cm (12 × 8 in) for a starter colony, and larger for breeding groups or active climbers.
- Modified plastic shoeboxes and totes: inexpensive, lightweight and easy to customise. Use food-safe polypropylene (recycling code 5) or similar, and avoid containers that have held chemicals or strongly scented products.
- Acrylic or glass displays: better for viewing and for planted bioactive builds. Acrylic is lighter and easier to drill, but it scratches. Choose models with ventilation strips or drill your own.
- Lids and mesh: lids reduce evaporation and escapes, but a solid sealed lid causes condensation and stale air. Cover every vent with fine stainless-steel or nylon mesh (about 1 mm openings) so that tiny hatchlings, springtails and flies cannot pass through.
Ventilation Hole Sizing
For a tote of about 15-30 litres, cut or drill ventilation openings that total roughly 2-5% of the lid area and side wall area combined. A practical starting point is two to four holes of 20-25 mm (about 3/4-1 in) on the low side wall at the wet end, and a larger mesh-covered panel (for example 8 × 5 cm) in the lid or upper wall at the dry end. Drill slowly with a stepped bit or hot tool, deburr the edges and glue mesh on the inside with a non-toxic, waterproof sealant or hot glue. Keep openings smaller for humidity-loving genera such as Cubaris, and larger for Armadillidium and Porcellio.
The 70/30 Moisture Gradient
The 70/30 rule divides the floor into a dry zone covering about 70% of the area and a damp hydration zone covering about 30%. Humidity-loving animals gather in the wet end, while the rest of the colony forages in the dry end. They move between zones as their needs change, which prevents both desiccation and drowning.
- Slope or divide the floor. Place the damp zone at one end. In a tote, you can tilt the substrate slightly or build a low substrate dam so water does not creep across the whole floor.
- Pack the wet end with long-fibre sphagnum. Rinse the moss, squeeze it until it stops dripping and press it over the damp substrate base, 3-5 cm deep. It should feel like a wrung-out sponge.
- Keep the dry end genuinely dry on the surface. Substrate should be slightly damp only in the bottom layer. Mist the wet end, not the whole enclosure.
- Add a transition zone. Leave a 10-15 cm band of intermediate moisture so that animals can acclimate, and so that humidity moves gently through the leaf litter.
- Check weekly. Probe the substrate with a finger and watch the animals: if all are crowded in the wet zone, the dry end is too dry or too warm; if all are in the dry end, the wet zone is too wet or too sour.
The checklist table above sets out each zone, its target moisture and how often to check it.
Substrate Depth and Leaf Litter
Use a minimum of 5-8 cm of organic-rich substrate, and 6-10 cm for burrowing genera such as Cubaris. Depth gives buffering, since a deep substrate dries slowly and provides a stable humidity gradient from top to bottom. It also gives females a place to moult and hatchlings a place to hide. A common base mix includes sifted topsoil or coco coir, hardwood mulch or decomposed wood, leaf litter and a calcium source; the full ratios and preparation steps are in the isopod substrate recipe and the isopod substrate calculator, which converts enclosure dimensions into the volume you need.
Over the substrate, spread a dense 2-3 cm layer of aged hardwood leaf litter, such as oak, magnolia, beech or maple. This sacrificial canopy is both food and cover: isopods feed on the partially decomposed leaves, and the litter slows evaporation from the substrate surface. Collect leaves from pesticide-free areas, dry them, and soak or freeze them before use to remove hitchhikers. Replace or top up the litter monthly as it breaks down, and avoid conifer needles and fresh green leaves.
Microhabitats and Hides
Isopods are cryptic animals that spend most of the day under cover. Without enough hides they stay stressed, cluster in a few places and compete for space. Provide at least one hide per five to ten animals.
- Cork bark rounds and flats: lean them over the wet zone and along the transition zone. They hold humidity underneath and give a surface to graze algae and biofilm.
- Decaying white-rot wood chunks: partially decomposed oak, beech or poplar is soft enough to chew and supports fungi and microfauna. Bury half of each piece in the substrate.
- Limestone rock or cuttlebone: a flat piece of limestone on the dry side provides a continuous calcium source for exoskeleton development and breeding females.
- Bark for climbers: Porcellio species climb, so add leaning bark so that they have vertical hiding spaces instead of scaling the walls.
Cross-Ventilation Physics
Warm, humid air is lighter than cool, dry air, and it tends to rise. Ventilation works best when it uses this natural convection. Place intake holes low on the moist side so that cooler, fresher air enters near the damp zone and picks up a little moisture, and place exhaust holes high on the dry side so that warmer, stale air can leave. This creates a slow convective loop across the enclosure, which clears carbon dioxide and ammonia, reduces condensation and keeps the dry zone dry. If you place vents only at the top, humid air escapes rapidly and the whole enclosure dries out; if you place them only at the bottom, air stagnates and the lid sweats.
Test the airflow by checking for condensation on the lid and walls about an hour after misting. Heavy droplets mean too little ventilation, and a bone-dry wet zone within a day means too much. Adjust by taping some holes shut or enlarging others. Humidity-sensitive genera such as Cubaris do best with fewer or smaller vents, and with the ventilation concentrated on the dry side.
Genus-Specific Parameters
The first table above compares Armadillidium, Porcellio and Cubaris for ventilation, humidity, temperature and litter depth. As a rule, Armadillidium tolerate drier, cooler setups, Porcellio are fast and need secure lids, and Cubaris need warmer, more humid and more carefully ventilated conditions. For species-specific details on one of the most popular tropical species, see the rubber ducky isopod care guide.
Cleanup Crew and Pest Control
Springtails (Collembola) are the standard companion for isopods. They graze on mold and fungal films and compete little with isopods for food. Learn how to culture them in our springtail culturing guide, and how to balance populations in the bioactive cleanup crew guide. Add springtails after the enclosure has stabilised for a few days and keep the wet zone consistently damp, since they need moisture to survive.
Preventing Fungus Gnats
Fungus gnats breed in wet, fungus-rich organic matter. To prevent them, keep the dry zone genuinely dry, avoid sogginess in the wet zone, use mesh on every vent, freeze or bake leaf litter and wood before adding them, and remove uneaten food within 24-48 hours. A thin layer of coarse sand or fine gravel over a damp area, sticky traps near the vents and a healthy springtail population also reduce gnat numbers.
Feeding and Supplements
Leaf litter and rotting wood are the staple. Offer supplemental food two to three times a week in small amounts on a flat piece of bark or a dish: sliced vegetables (carrot, courgette or sweet potato), dried leaves, fish flakes or shrimp pellets for protein, and a calcium source such as cuttlebone or crushed eggshell. Remove uneaten fresh food within 24-48 hours to avoid mold and mites. Do not feed salty, spicy, processed or citrus foods.
Step-by-Step Setup
- Prepare the enclosure. Drill and mesh the ventilation holes, wash the container with hot water only, and let it dry.
- Mix the substrate. Moisten it until it holds together when squeezed but releases only a few drops.
- Add 5-8 cm of substrate and slightly mound the wet end.
- Pack the sphagnum over the wet end, covering about 30% of the floor.
- Place hides and calcium. Position cork bark over the wet and transition zones, white-rot wood and limestone on the dry side.
- Cover with 2-3 cm of leaf litter and moisten the wet end only.
- Let the enclosure settle for 24-48 hours and check the ventilation, then add the isopods and food.
Troubleshooting Summary
| Symptom | Likely cause | Quick fix |
|---|---|---|
| All isopods crowd in the wet zone | Dry zone too dry or too warm | Slightly moisten the transition zone; add more leaf litter and hides |
| Isopods climbing the walls and lid | Too dry, too bright, hungry or too crowded | Check moisture, feed, add bark and dim the light |
| White mold on food or wood | Overfeeding or stagnant air | Remove it, reduce food, improve ventilation, add springtails |
| Fungus gnats | Wet substrate with fungal food | Dry the surface, add mesh, sticky traps and springtails |
| Sour smell, black wet substrate | Waterlogging and anaerobic conditions | Remove wet material, replace it and open up ventilation |
Related Resources
Continue with the isopod substrate recipe, calculate quantities in the isopod substrate calculator, learn about rubber ducky isopod care, culture a cleanup crew with the springtail guide and balance it using the cleanup crew balance guide.
Frequently Asked Questions
How often should I mist an isopod terrarium?
Mist the wet zone only, typically every 2-4 days depending on room humidity and ventilation, until the sphagnum is evenly damp but not dripping. Do not mist the dry zone. If the wet zone dries out within a day, reduce ventilation slightly; if the lid constantly sweats, mist less and increase airflow.
How do I prevent fungus gnats in an isopod enclosure?
Keep the dry zone dry, avoid waterlogged substrate, cover all vents with fine mesh, freeze or bake leaf litter and wood before use, and remove uneaten food within 24-48 hours. Add sticky traps near the vents and a springtail population to reduce larvae. Persistent gnats usually mean the substrate is too wet or too rich in fresh organic matter.
Why is there white mold on my substrate or wood?
White fuzz is usually saprophytic fungus feeding on fresh wood, uneaten food or newly added leaf litter. It often appears in the first weeks and fades by itself. Remove obvious patches, cut back food, improve airflow and add springtails. Mold on a sour, slimy substrate is a sign of waterlogging, which needs corrective action.
Why do my isopods keep trying to escape?
Escaping usually signals stress: substrate that is too dry or too wet, too little food, overcrowding, bright light or a new enclosure. Fast climbers such as many Porcellio species escape through small gaps. Check moisture across the gradient, add food and hides, secure the lid with mesh and a lip, and give climbers leaning bark so they have vertical cover.
What should I feed isopods besides leaf litter?
Offer small amounts of vegetables such as carrot, courgette or sweet potato, plus a protein source such as fish flakes or shrimp pellets, two to three times a week. Provide a continuous calcium source, such as cuttlebone, crushed oyster shell or limestone. Remove uneaten fresh food within 24-48 hours.
What is the 70/30 moisture gradient?
It means keeping about 30% of the enclosure floor damp, usually at one end packed with long-fibre sphagnum, and the remaining 70% dry. The damp zone provides hydration and humidity, while the dry zone supports foraging and prevents mold. Isopods move between zones to regulate their own moisture.
How deep should the substrate and leaf litter be?
Provide at least 5-8 cm of substrate (6-10 cm for Cubaris and burrowers) and a 2-3 cm layer of aged hardwood leaf litter on top. The depth buffers humidity and provides burrowing space, while the leaf litter acts as food and cover. Top it up monthly as it decomposes.
Do I need a heat mat or lighting for isopods?
Most common temperate species live well at room temperature of 18-26 °C (64-79 °F) and need no special lighting. Tropical species such as Cubaris prefer 22-27 °C (72-81 °F), which a low-wattage heat mat on the side of the enclosure can provide, never directly beneath the substrate. Isopods avoid bright light, so keep them away from direct sun, which can overheat the container.
Can I keep different isopod species together?
It is best to keep separate species in separate enclosures. Different species may hybridise within a genus, outcompete each other for food, or need different humidity. Mixing Cubaris with Armadillidium, for example, cannot satisfy both sets of requirements. Keep a small set of springtails as the only shared companion.
How can I tell if my enclosure has too little or too much ventilation?
Heavy condensation on the lid, a musty smell, mold and gnats indicate too little ventilation. A wet zone that dries within a day and animals crowding in the damp area indicate too much. Adjust by taping vent holes shut or adding more, and keep the intake low on the moist side and the exhaust high on the dry side.
Sources & References
-
Source: si.edu
Type: horticultural-reference
-
Source: rhs.org.uk
Type: horticultural-reference
-
Source: nhm.ac.uk
Type: horticultural-reference
Explore More
Related Articles
Related Plant Guides
No specific plant guides found matching this topic.
Recommended next actions
Continue Exploring
Dive deeper into related plant care tools and profiles.
Calculator
Isopod Substrate & Leaf Litter Calculator
Calculate exact volumes of decayed white wood, flake soil, leaf litter, worm castings, and calcium for any isopod terrarium volume or container dimensions.
Topic Guide
Bioactive Cleanup Crew Balance: Isopods and Springtails Cohabitation
Maintain the ideal isopod-to-springtail balance in bioactive terrariums: niche partitioning, crash prevention, food competition, and population control.
Topic Guide
DIY Isopod Substrate Recipe: Ratios, Ingredients & Preparation
Master DIY isopod substrate recipe by volume: decayed white-rot wood, fermented flake soil, oak leaf compost, worm castings, and calcium carbonate ratios.
Topic Guide
Cubaris sp. 'Rubber Ducky' Isopod Care & Enclosure Guide
Complete Cubaris sp. 'Rubber Ducky' care guide: limestone caves, 80-90% humidity, deep burrowing substrate, white-rot wood diet, and breeding tips.
Topic Guide
How to Culture Springtails on Charcoal: Setup, Feeding & Harvesting
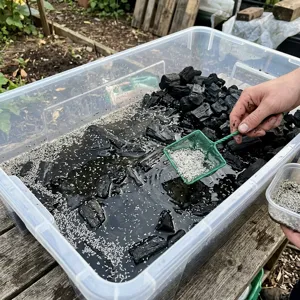
Step-by-step springtail culturing on horticultural lump charcoal: setup, feeding with active dry yeast, flooding harvests, and crash prevention.